






Testing is a crucial aspect of software development, ensuring reliability, functionality, and performance before deployment. In this blog, we will explore how to test a Golang CRUD application on Bitbucket using Docker for the database and dependencies. We will approach it from both a developer’s and a DevOps perspective, covering unit tests, integration tests, CI/CD automation, and best practices.
Overview of the Application
We will use a Golang CRUD application that utilizes GraphQL, PostgreSQL, and the go-chi router. The app has two main entities:
AuthorPost
The application supports operations like creating, reading, updating, and deleting (CRUD) authors and posts.
Key Technologies Used:
- Golang: The programming language.
- PostgreSQL: The database running via Docker.
- GraphQL: The API query language.
- Docker and Docker Compose: For containerizing the application and its dependencies.
- Bitbucket Pipelines: For automated testing and deployment.
Step 1: Writing Unit Tests
Unit tests ensure that individual components function correctly. We will use Go’s testing package (testing) to write unit tests for our CRUD operations, alongside Keploy UTG.
1.1 Setting Up Testing in Go
1.2 Sample Unit Test for Panic and Error
The two tests below cover the edges rather than the happy path. TestCheckErr confirms that our checkErr helper actually panics when handed an error, using a deferred recover() to catch it. TestMainFunction starts main() in a goroutine and makes sure the application boots without panicking. These are quick sanity checks that catch the kind of failure that takes a whole service down at startup.
Create Author Test
The next test is the substantial one, and it exercises the full create path end to end. It connects to Postgres, creates an authors table, defines the GraphQL schema with an Author type and a createAuthor mutation, spins up a test server with httptest, fires a real mutation over HTTP, and then asserts on both the response and the database row that should have been written. A deferred cleanup drops the table afterward so each run starts fresh. Reading it top to bottom is a good way to see how a GraphQL resolver, an HTTP handler, and a database all fit together in one test.
Similarly, we can write test cases for reading, updating, and deleting authors and posts, following the same pattern of setting up state, exercising the operation, and asserting on both the response and the database.
Step 2: E2E API Testing
Unit tests confirm each piece works. E2E API tests confirm the pieces work together, checking that a real request flows correctly through the router, the resolver, and the database. Rather than writing these by hand, we can record them from real traffic.
2.1 Sample API Test for GraphQL API
We can create our API testing cases with Keploy:
Once Keploy is installed, we build the binary of our application:
With the binary ready, this command starts recording the API calls using eBPF:
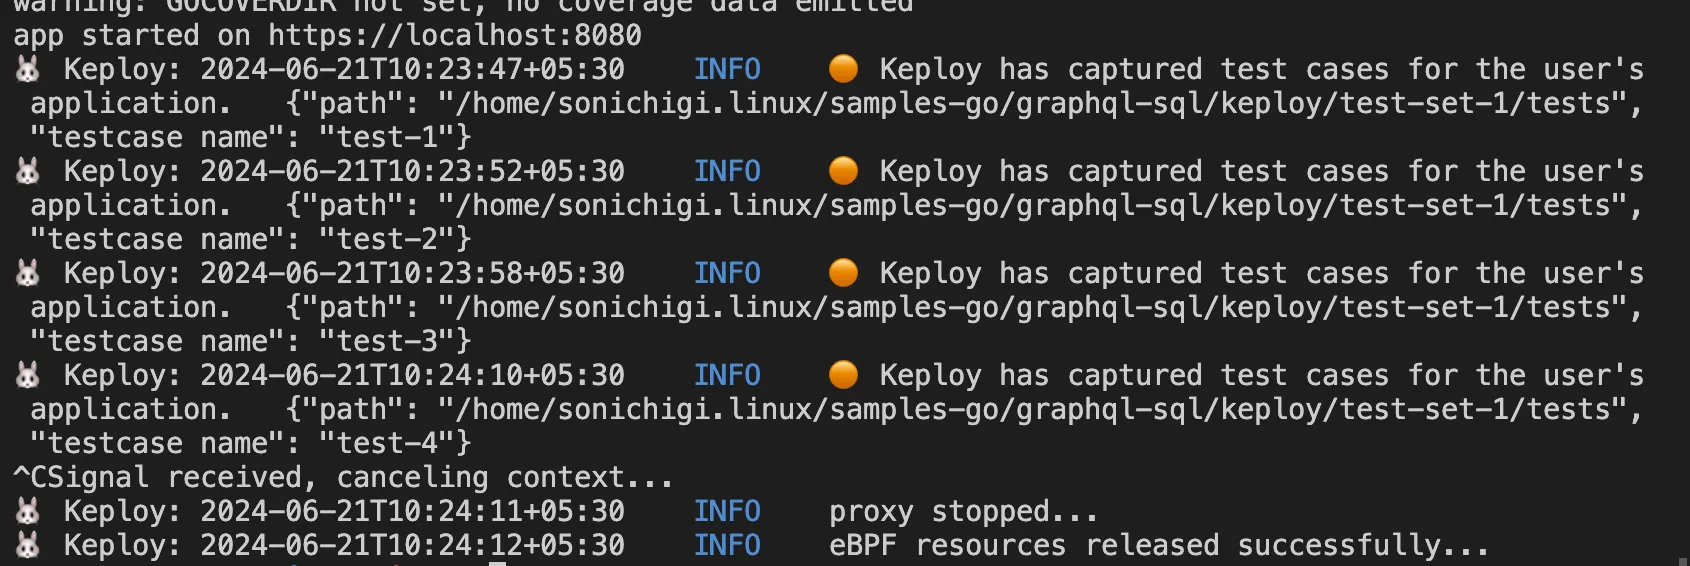
Now make some API calls using Hoppscotch, Postman, or the cURL command. Keploy captures those calls and generates test suites containing test cases and data mocks, similar to below. The key idea is that you exercise the API once, by hand, and Keploy turns that real interaction into a repeatable test.
Run the Testcases
Now let’s run the test mode (in the graphql-sql directory):
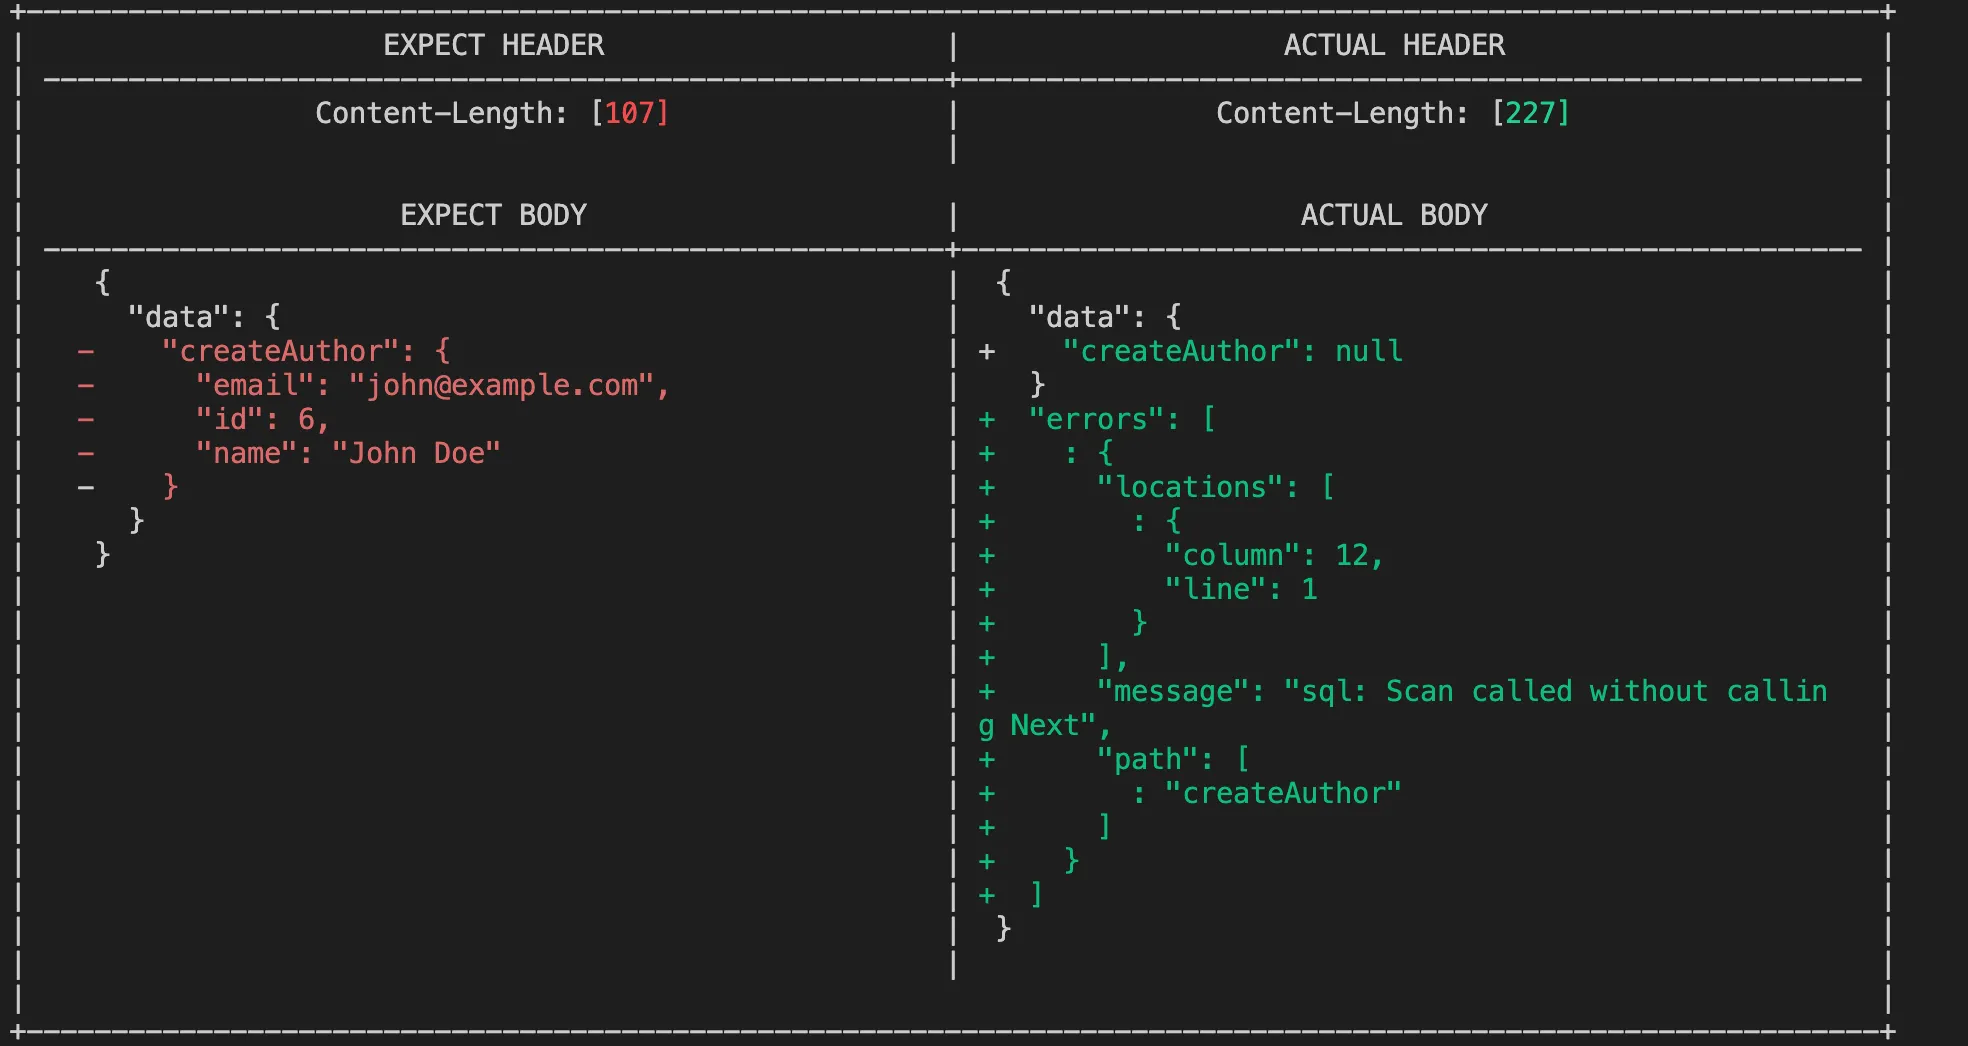
We can notice that our first test case failed due to a database configuration issue:
Our final test result will look like this:
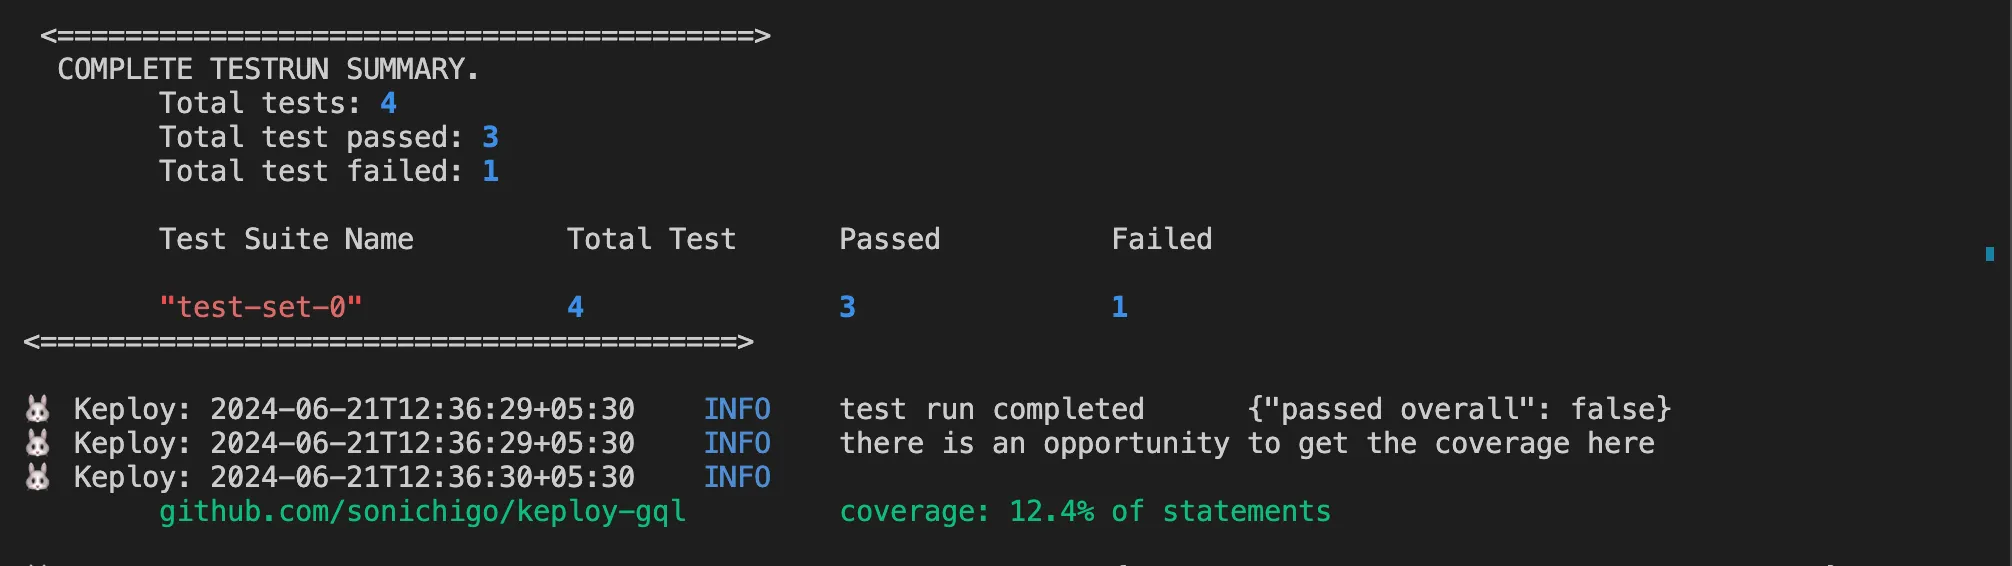
With a couple of API calls, we reached up to 12.4% code coverage.
Collecting code coverage becomes more complex once an application runs inside a container, particularly when coverage tools need to preserve output and map it correctly back to the source code.
Step 3: Dockerizing the Application
Containerizing the app makes the test environment identical on your laptop and in the pipeline, which removes a whole category of "works on my machine" failures. We will create a Dockerfile and a docker-compose.yml file to containerize the application and its dependencies.
3.1 Dockerfile
Creating the Docker Compose Configuration
The compose file brings up Postgres alongside the app and wires them together through environment variables, so a single command gives you a running database and application.
Run the application using:
Step 4: Setting Up Bitbucket Pipelines for Automated Testing
Bitbucket Pipelines automates testing and deployment in CI/CD workflows, so the tests we just wrote run on every push rather than only when someone remembers to run them.
4.1 Configure bitbucket-pipelines.yml
Create a .bitbucket-pipelines.yml file in the project root. The default pipeline runs the tests on every push, and the main branch gets an additional deployment step.
4.2 Adding a PostgreSQL Service in Pipelines
Because the tests need a database, we define Postgres as a pipeline service so it is available while the tests run.
This ensures that PostgreSQL is available when running tests.
Step 5: Running Tests in Bitbucket
Push the changes to Bitbucket and trigger a pipeline run:
Bitbucket will automatically run the tests defined in bitbucket-pipelines.yml, and you will see the results in the pipeline view for that commit.
Conclusion
Testing in Bitbucket Pipelines enhances development by:
- Ensuring Code Quality: Catch bugs before deployment.
- Automating Tests: Run tests automatically on each commit.
- CI/CD Integration: Deploy only tested and validated code.
By leveraging unit tests, integration tests, Docker, and Bitbucket Pipelines, we can efficiently test and deploy our Golang CRUD application with confidence, catching regressions early instead of in production.
FAQs
1. What is Bitbucket Pipelines?
Bitbucket Pipelines is a CI/CD tool built into Bitbucket that automates testing and deployment directly from your repository, running a defined set of steps on every push.
2. Why use Docker in testing?
Docker ensures a consistent environment across development, testing, and production, so tests behave the same way locally and in the pipeline and you avoid environment-specific failures.
3. How do I debug a failing test in Bitbucket?
Use your bitbucket-pipelines.yml to print logs and enable verbose test output, which shows exactly which assertion failed:
4. Can I run pipelines locally before pushing to Bitbucket?
Yes. Use the Bitbucket Pipelines Runner, or simply run the tests locally before committing:
5. How do I integrate coverage reports in Bitbucket?
Modify the pipeline to generate coverage reports:
This helps track test coverage as part of your CI/CD workflow.