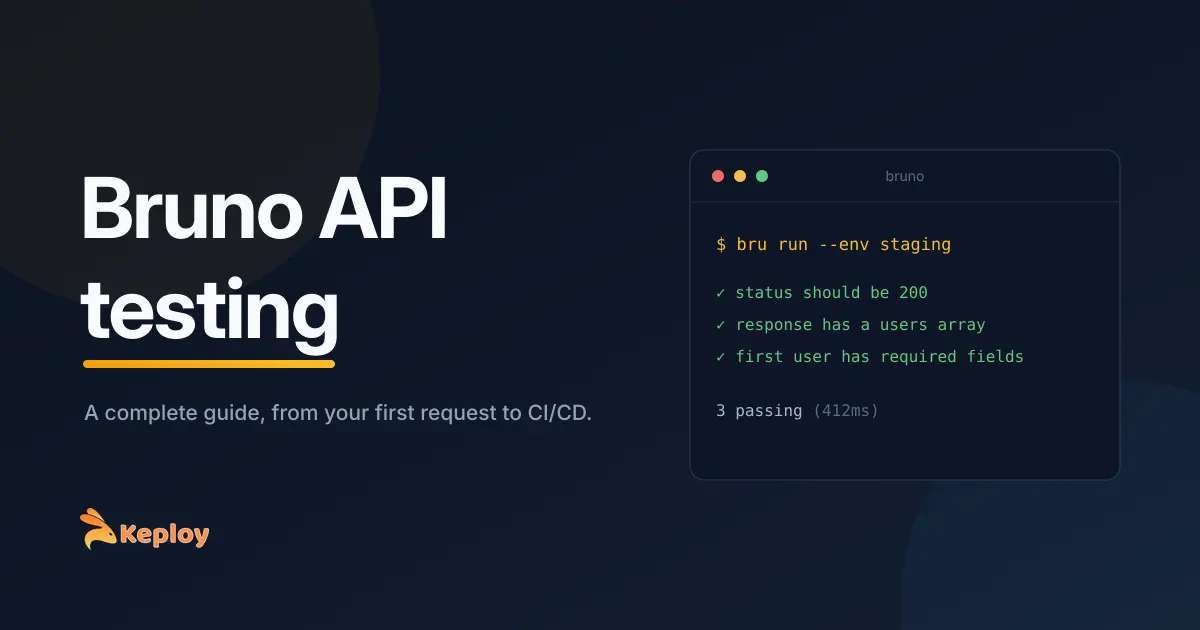






Bruno is an open source, offline-first API client that stores your API collections as plain text files inside your Git repo. It gives you a fast GUI for building and sending REST, GraphQL, gRPC, and WebSocket requests, plus a scripting layer for writing tests against the responses. This guide covers Bruno API testing from install to CI, so by the end you can build a request, assert on its response, and run the whole suite from the command line.
What is Bruno?
Bruno is a lightweight API client built as a Git-native alternative to Postman. Instead of syncing collections to a cloud account, Bruno saves each request as a .bru file on your filesystem using a plain text markup language called Bru. Because the collection lives in your repository, you version it with Git like any other code, review changes in pull requests, and keep sensitive tokens off third-party servers.
Two things make Bruno stand out for API testing. It is offline-first, so there is no account, no cloud sync, and no per-seat licensing. And it is file-based, so your API tests travel with the code they test.
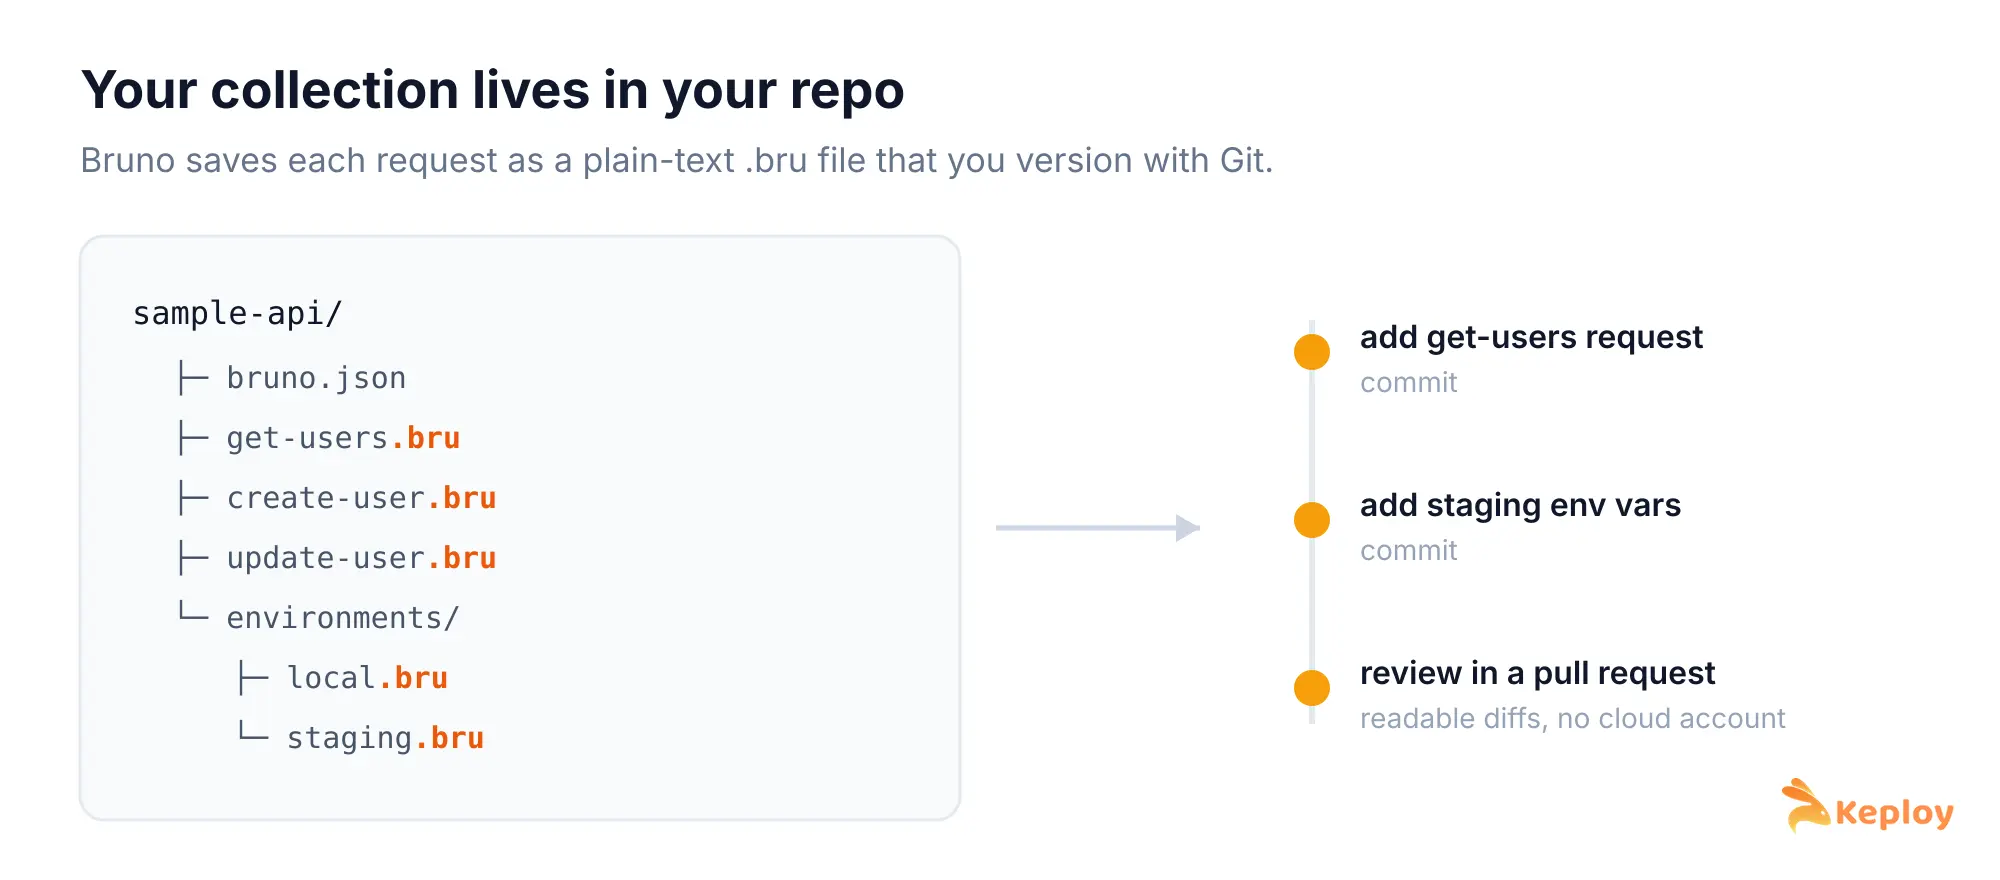
Bruno keeps your whole collection as plain text files inside the repo, so it versions right alongside your code.
Why use Bruno for API testing
Bruno fits teams and individual developers who want a simple, transparent way to test APIs without heavyweight tooling. The main reasons people pick it:
- It is open source and free, with an active community.
- Collections are plain text, so diffs are readable and collaboration happens through Git.
- It supports REST, GraphQL, gRPC, and WebSocket in one interface.
- It runs fully offline, which suits teams with strict data-privacy requirements.
- It ships a free CLI, so the same requests you build in the GUI run in CI.
Bruno is a manual, request-first tool. You build each request by hand and write assertions for the responses you care about. That is ideal for exploration and focused checks, and it is worth knowing where that model starts to cost you time as a suite grows, which we cover later in this guide.
Installing Bruno
You can install Bruno as a desktop app, through a package manager, or as a standalone CLI for automation. Most people start with the desktop app and add the CLI later.
Desktop app
Download the installer for macOS, Windows, or Linux from the official Bruno website and run it. The app is the main workspace where you build collections, send requests, and write tests.
Package managers
If you prefer the command line, Bruno is available through common package managers:
Bruno CLI
The CLI runs your collections without the GUI, which is what you use in CI/CD. Install it from npm:
Once installed, the bru command is available in any collection folder. We come back to it in the CLI section below.
Creating your first collection and request
A collection in Bruno is a folder of related requests. Everything you build is saved into it as files you can commit.
Create a collection
In the Bruno app, choose to create a new collection and give it a clear name, for example sample-api. Pick a location inside a project you can track with Git. Bruno writes a bruno.json config file and stores each request you add as its own .bru file in that folder.
Add a request
Inside the collection, add a new request and name it something descriptive like get-users. Then:
- Set the HTTP method. Use
GETto fetch data. - Enter the endpoint URL, for example
https://api.example.com/users. - Click Send.
Bruno sends the request and shows the status code, response time, and body in the response panel.
Add headers and query parameters
Most real APIs need headers or parameters. Use the Headers tab to add authentication, for example a key of Authorization with a value of Bearer <your_token>. Use the Params tab to add query parameters such as status=active to filter results. Each of these is saved into the .bru file, so the next person to open the collection sees the exact same request.
SCREENSHOT NEEDED: the Bruno request builder with a
GETrequest to/users, the Send button, and the response panel showing a JSON body and a 200 status.
Suggested alt text: "Bruno request builder sending a GET request and showing the JSON response"
Suggested caption: The request builder, where you set the method, URL, headers, and params, then send.
Working with environments and variables
Hardcoding URLs and tokens into every request does not scale. Bruno solves this with environments and variables.
Create separate environments such as local, staging, and production, and define variables like baseUrl and authToken in each. In your requests, reference them with double braces:
Switch environments from the dropdown in the app, and every request that uses {{baseUrl}} points at the right host without any edits. You can also set variables at runtime from scripts, which is how you carry a token from a login response into later requests.
SCREENSHOT NEEDED (optional): the Bruno environment selector open, showing
local,staging, andproduction, with a couple of variables defined.
Suggested alt text: "Bruno environment selector with local, staging, and production environments"
Writing tests in Bruno
This is the core of Bruno API testing. Bruno gives you two ways to validate a response: a declarative Assert tab for simple checks, and a Tests tab for JavaScript assertions using the Chai library. Both run automatically in a fixed order after each response.
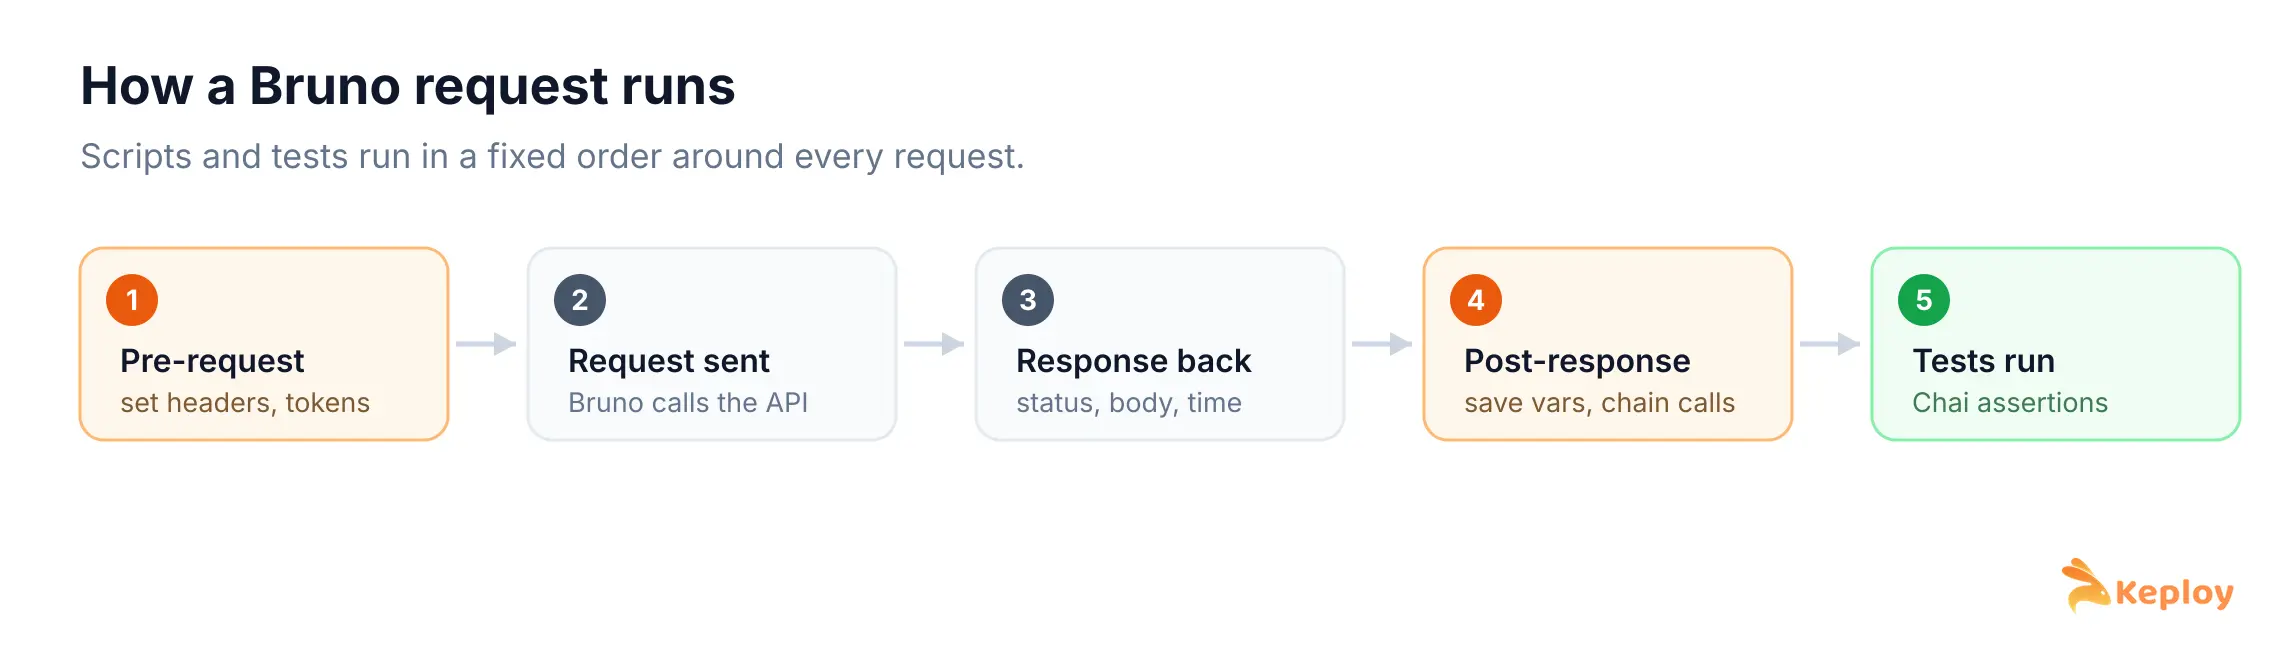
Every request follows the same order: pre-request script, request, response, post-response script, then tests.
Assertions vs test scripts
Use the Assert tab when you want a quick, declarative check, for example that the status code equals 200 or that a field equals an expected value. Use the Tests tab when you need loops, conditional logic, or multiple related checks in one place. Most teams end up using both.
Writing test scripts with Chai
In the Tests tab, test, expect, and assert are globally available, and res holds the response. A basic test looks like this:
You have the full Chai expect vocabulary, including to.equal, to.deep.equal, to.have.property, to.be.an, and to.be.oneOf. Tests run automatically after each response, and Bruno reports each one as pass or fail.
SCREENSHOT NEEDED: the Bruno Tests tab with a few of the assertions above written, and the results panel showing green passing tests (and ideally one red failing test).
Suggested alt text: "Bruno Tests tab showing passing Chai assertions in the results panel"
Suggested caption: Bruno runs each test after the response and marks it pass or fail.
Pre-request and post-response scripts
Beyond tests, Bruno runs pre-request scripts before a request is sent and post-response scripts after the response arrives. A common use is injecting a fresh token before the request goes out:
The bru object manages variables and environment state. The methods you will use most are bru.getVar, bru.setVar, bru.getEnvVar, and bru.setEnvVar.
Chaining requests with variables
To test a real flow, you often need the output of one request as the input to the next. Capture a value in a test or post-response script and save it to a variable:
A later request can then send {{authToken}} in its Authorization header. This is how you build multi-step tests such as log in, create a resource, then read it back.
Running Bruno tests from the CLI
The Bruno CLI runs the same collection outside the GUI, which is what makes Bruno usable for automation. From inside a collection folder:
The CLI exits with a non-zero status when a test fails, which is exactly what a CI pipeline needs to fail a build. You can also generate a shareable HTML report:
Automating Bruno in CI/CD
Because your .bru files live in the repo and the CLI runs them, wiring Bruno into CI is straightforward. Install the CLI in your pipeline, then run the collection as a build step. A minimal GitHub Actions job looks like this:
If any assertion fails, bru run returns a non-zero exit code and the job fails. There are also official Docker images for the CLI if you would rather not install Node in the runner:
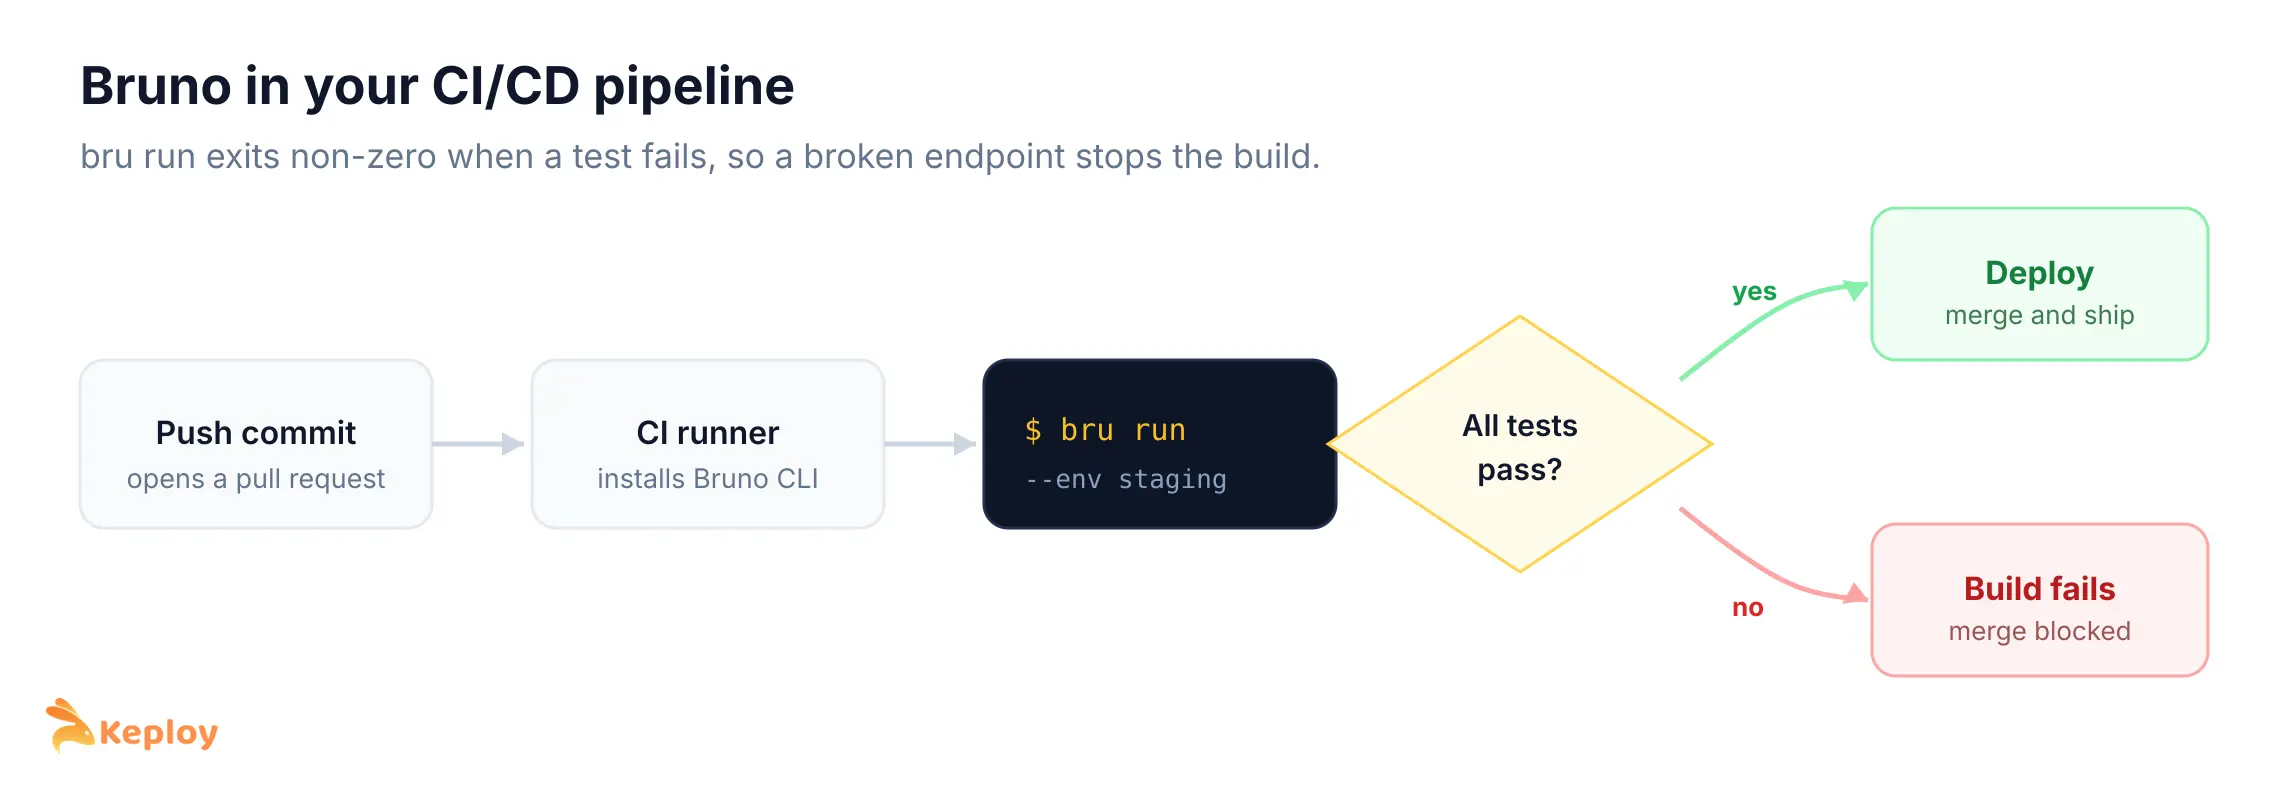
Because bru run returns a non-zero exit code on failure, a broken endpoint blocks the merge.
Best practices for API testing with Bruno
- Organize requests into collections and folders that mirror your API, so tests are easy to find.
- Keep secrets in environment variables, never hardcoded in requests, and keep secret values out of the committed files.
- Write tests as you build requests rather than after, so coverage keeps pace with the API.
- Use pre-request scripts for auth setup instead of pasting tokens into each request.
- Run the collection in CI on every pull request so a broken endpoint is caught before merge.
Common issues and troubleshooting
- Cannot connect to the server: check the base URL and confirm the service is running. For HTTPS, make sure the certificate is valid.
- Unauthorized responses: confirm the token has not expired and that the Authorization header is set, ideally from an environment variable.
- Test script not running: check the Tests tab for JavaScript syntax errors, since one bad line stops the rest.
- Slow or flaky responses: rule out rate limiting and network issues, and consider testing against a stable environment rather than a busy shared one.
Taking Bruno further: automated regression testing with Keploy
Bruno is excellent for building and testing requests by hand. The limit shows up as the suite grows. Every new endpoint means a new request and new assertions to write, every refactor can break tests you then have to fix, and Bruno does not mock the databases or downstream services your API depends on, so those either hit real endpoints or need scripting to handle.
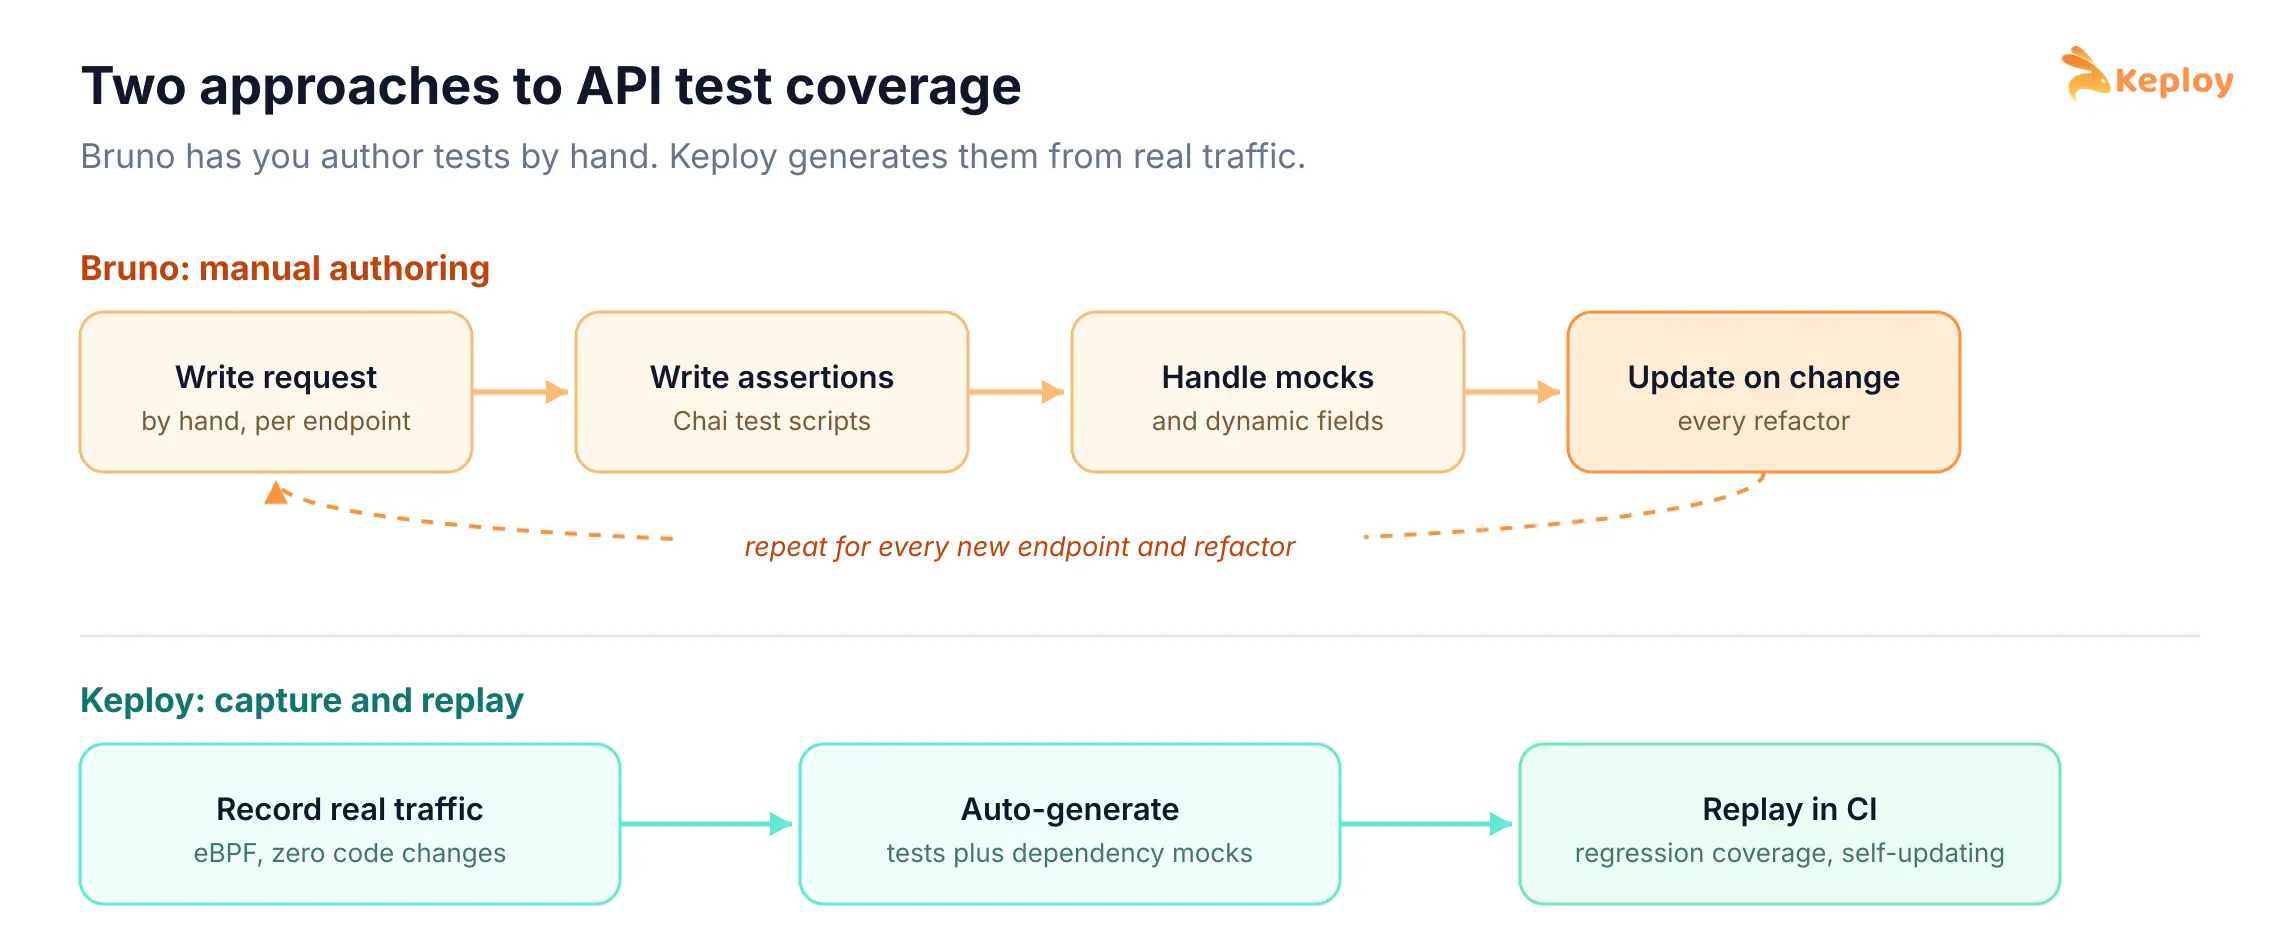
Bruno and Keploy solve regression coverage from opposite ends. Many teams run both.
This is where an auto-generation tool complements Bruno. Keploy takes a different approach to the same goal of regression coverage. Instead of asking you to author each test, it records your real API traffic using eBPF at the kernel level, with zero code changes, and replays that traffic as deterministic test cases. It also auto-generates mocks for every downstream dependency, and it handles non-deterministic fields like timestamps and IDs automatically so tests do not flake. If you would rather generate tests from a spec than from live traffic, Keploy can also build a suite from an OpenAPI spec, a Postman collection, or raw cURL commands.
A practical way to think about it: use Bruno for exploration and focused manual checks, and use Keploy to generate broad regression coverage from the traffic your app already serves. If you are weighing the two directly, the Bruno vs Keploy comparison breaks down how test generation, mocking, and CI setup differ between them.
Ready to add automated regression coverage on top of your Bruno workflow? Start generating tests with Keploy.
Frequently asked questions
Is Bruno good for API testing?
Yes. Bruno is a capable API client for building requests and writing assertions against responses, with a Chai-based test scripting layer and a free CLI for automation. It is a strong fit for manual and exploratory testing and for teams that want their collections versioned in Git.
Is Bruno free and open source?
Yes. Bruno is open source and free to use, with optional paid tiers for advanced features. The core client and the CLI are free.
How does Bruno store API collections?
Bruno stores each request as a plain text .bru file on your filesystem, using a markup language called Bru. Because the files live in your project folder, you version them with Git and review changes in pull requests.
Can I run Bruno tests in CI/CD?
Yes. Install the Bruno CLI in your pipeline and run bru run against your collection. The command exits non-zero when a test fails, which fails the build. Official Docker images are also available for running collections without installing Node.
What is the difference between the Assert tab and the Tests tab in Bruno?
The Assert tab is for simple, declarative checks such as a status code or a single field value. The Tests tab is for JavaScript assertions using Chai, where you can write loops, conditional logic, and multiple related checks in one script.
How do I automate regression tests instead of writing them by hand?
Manual clients like Bruno need a new request and new assertions for each endpoint. To generate regression tests automatically, a tool like Keploy records real API traffic and replays it as tests with auto-generated mocks, so coverage grows from actual usage rather than hand-written scripts.