Kubernetes Local Setup (Kind)
This guide walks you through creating a local Kind Kubernetes cluster and connecting it to Keploy using a NodePort (example: 30080) so you can live record and replay traffic for Pods.
[!NOTE] This documentation covers local Kind cluster setup. Documentation for hosted cluster setup is coming soon.
Prerequisites
Ensure you have the following before you begin:
- Keploy Enterprise account (with an access key)
- kubectl configured to access your Kubernetes cluster
- Helm installed
- Kind installed
1) Create a Local Kind Cluster (with NodePort Mapping)
1.1 Install Kind
Install Kind using the official instructions:
https://kind.sigs.k8s.io/docs/user/quick-start/#installing-from-release-binaries
1.2 Create Kind Cluster Config (NodePort: 30080)
Create a file named kind-cluster.yaml with the following contents:
kind: Cluster
apiVersion: kind.x-k8s.io/v1alpha4
nodes:
  - role: control-plane
    extraPortMappings:
      - containerPort: 30080
        hostPort: 30080
        protocol: TCP
1.3 Create the Cluster
Run:
kind create cluster --config kind-cluster.yaml
1.4 Verify the Cluster is Ready
Confirm the cluster components are running:
kubectl get pods --all-namespaces
Expected output should look similar to:
NAMESPACE            NAME                                              READY   STATUS    RESTARTS   AGE
kube-system          coredns-7d764666f9-r82lr                          1/1     Running   0          42s
kube-system          coredns-7d764666f9-rsjsv                          1/1     Running   0          42s
kube-system          etcd-local-k8s-control-plane                      1/1     Running   0          49s
kube-system          kindnet-c59v6                                     1/1     Running   0          42s
kube-system          kube-apiserver-local-k8s-control-plane            1/1     Running   0          49s
kube-system          kube-controller-manager-local-k8s-control-plane   1/1     Running   0          48s
kube-system          kube-proxy-xkch5                                  1/1     Running   0          42s
kube-system          kube-scheduler-local-k8s-control-plane            1/1     Running   0          49s
local-path-storage   local-path-provisioner-67b8995b4b-csn49           1/1     Running   0          42s
✅ Your local Kind cluster is ready.
2) Connect the Cluster to Keploy (NodePort Setup)
2.1 Create Cluster Entry in Keploy
- Go to: https://app.keploy.io/clusters
- Click Connect New Cluster
- Enter:
- Cluster Name
- Ingress URL: Use
http://localhost:30080
[!NOTE] This setup has been tested with Google Chrome. Browsers treat
localhostas a secure context, which allows features that would otherwise require HTTPS. If you use an IP address instead, HTTPS would be required with a properly signed TLS certificate.If your cluster is running on a VM, see SSH Port Forwarding to access it via
localhostfrom your laptop.
- Click Connect
2.2 Install Keploy via Helm
Keploy UI will provide a Helm command. Ensure you set:
proxy.insecure.enabled=true(important for local NodePort)service.type=NodePortservice.nodePort=30080ingressUrlmatches what you entered in the UI (e.g.,http://localhost:30080)
Example command:
helm upgrade --install k8s-proxy oci://docker.io/keploy/k8s-proxy-chart --version <LATEST_VERSION> \
  --namespace keploy \
  --create-namespace \
  --set accessKey="<YOUR_KEY>" \
  --set clusterName="doc-test-2" \
  --set apiServerUrl="https://api.keploy.io" \
  --set service.type=NodePort \
  --set ingressUrl="http://localhost:30080" \
  --set service.nodePort=30080 \
  --set environment="prod" \
  --set proxy.insecure.enabled=true
2.3 Optional: SSH Port Forwarding (Access Keploy NodePort from Your Laptop)
If your Kubernetes cluster is running inside a VM and you want to use Chrome on your local machine to reach the Keploy NodePort (e.g., 30080), you can tunnel the port over SSH.
This is useful when:
- The NodePort is reachable from the VM, but not directly from your laptop due to NAT / firewall rules, or
- You want to avoid exposing the NodePort to your LAN.
Example: Forward Local 30080 → VM 30080
Run this on your local machine:
ssh -N \
  -L 30080:<VM_IP>:30080 \
  <username>@<VM_IP> -i /path/to/your/ssh/key
After this is running, you should be able to open the NodePort via:
http://localhost:30080
…and use that value for ingressUrl in the Keploy UI / Helm values.
Troubleshooting: channel ... open failed: connect failed: Connection refused
If you see something like:
channel 2: open failed: connect failed: Connection refused
It typically means the VM could not connect to the target IP:port from its own network namespace.
Common fixes:
-
Verify the NodePort is actually listening on the VM:
sudo ss -lntp | grep 30080 || true
sudo netstat -lntp | grep 30080 || true -
Confirm the Keploy NodePort service is created and uses the expected port:
kubectl -n keploy get svc
kubectl -n keploy get svc k8s-proxy -o yaml | sed -n '1,160p' -
If the NodePort is only bound on localhost inside the VM, forward to
127.0.0.1instead:ssh -N \
-L 30080:127.0.0.1:30080 \
<username>@<VM_IP> -i /path/to/your/ssh/key -
If you're running Kind inside Docker on the VM, ensure your Kind config includes the
extraPortMappingsand thathostPort: 30080is mapped correctly (as shown in this document).
[!TIP] If the VM's IP changes or you want the command to fail fast, add
-o ExitOnForwardFailure=yes.
3) Verify Keploy Pods Are Running
Check all namespaces:
kubectl get pods --all-namespaces
You should see Keploy components in the keploy namespace, similar to:
NAMESPACE            NAME                                              READY   STATUS    RESTARTS   AGE
keploy               k8s-proxy-65f4d8fd9-cmbmn                         1/1     Running   0          72s
keploy               k8s-proxy-minio-74849875b7-4w76s                  1/1     Running   0          72s
keploy               k8s-proxy-mongodb-6548798d96-2llzt                1/1     Running   0          72s
kube-system          coredns-7d764666f9-r82lr                          1/1     Running   0          8m7s
...
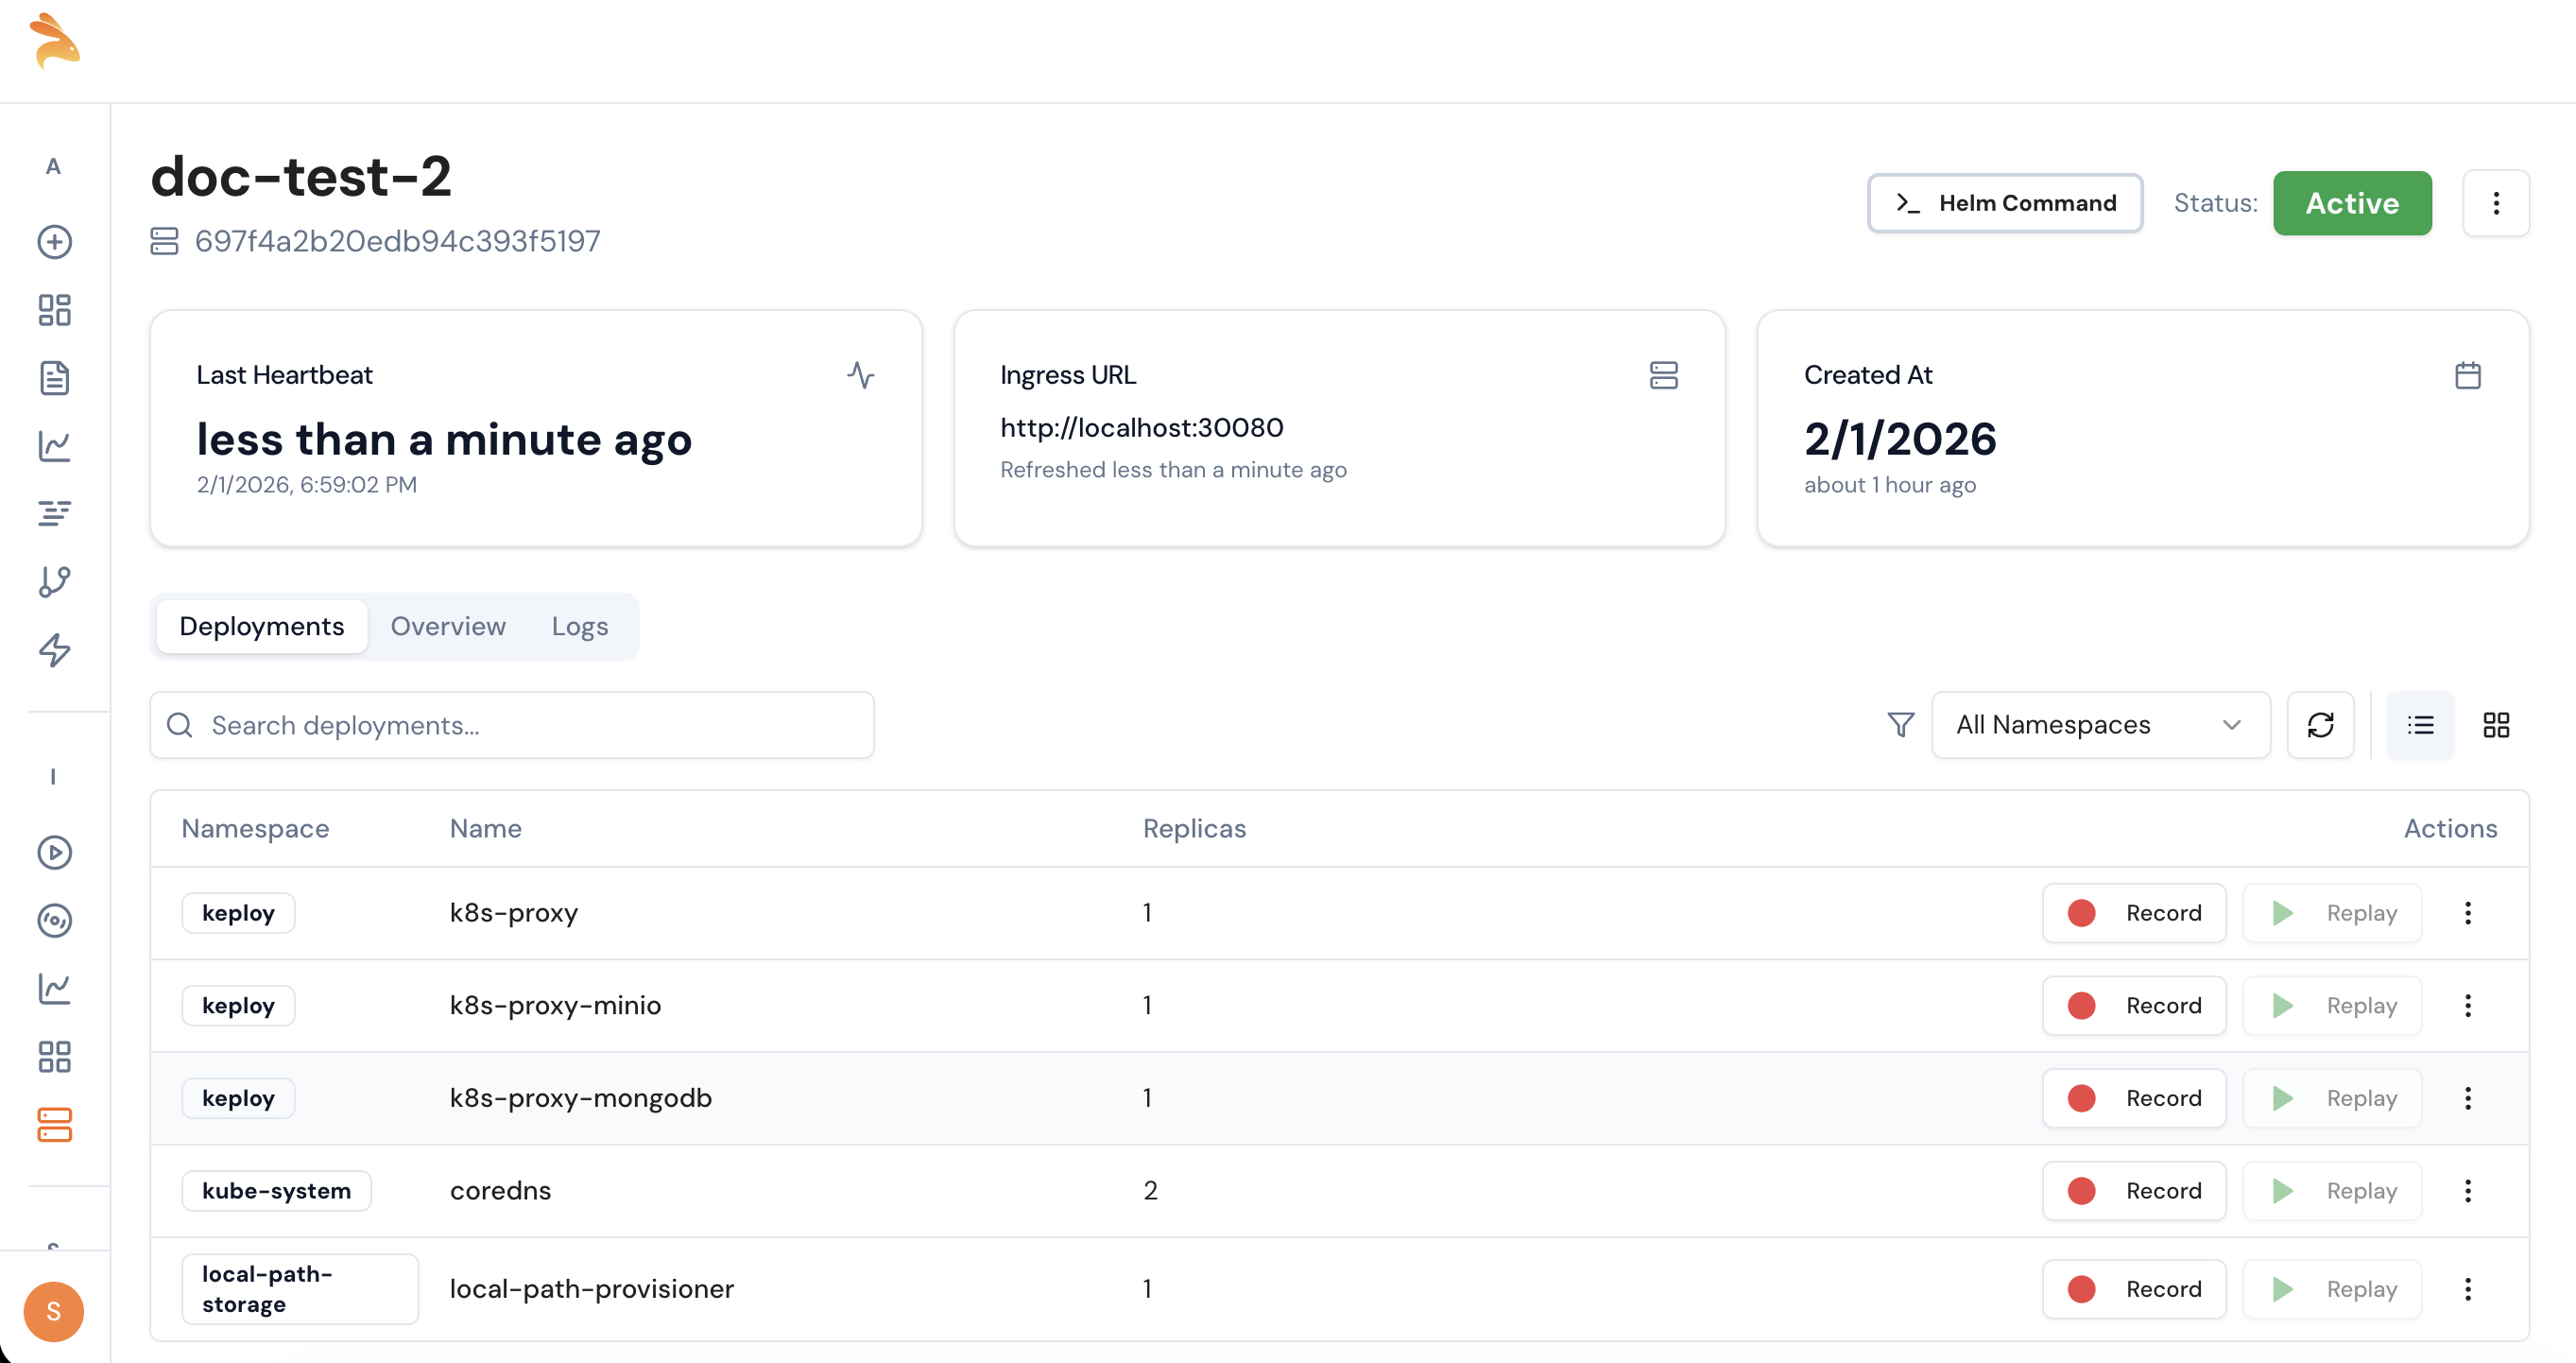
4) Confirm Cluster Visibility in Keploy UI
- Go back to: https://app.keploy.io/clusters
- Open your connected cluster
- Verify your deployments are visible
✅ Once deployments are visible, you can start recording on any Pod and later replay.