Adding New Test Suites
FreeTeamsScaleEnterpriseSelf-HostedDedicated
In this guide, we will walk through the process of adding a test suite in Keploy. Users can either manually provide the details for the test suite or directly import a curl command to create one.
Steps to Add a Test Suite
-
Click on the Plus Button
- Navigate to the test suite section in the Keploy interface.
- Click on the
+button to add a new test suite.
-
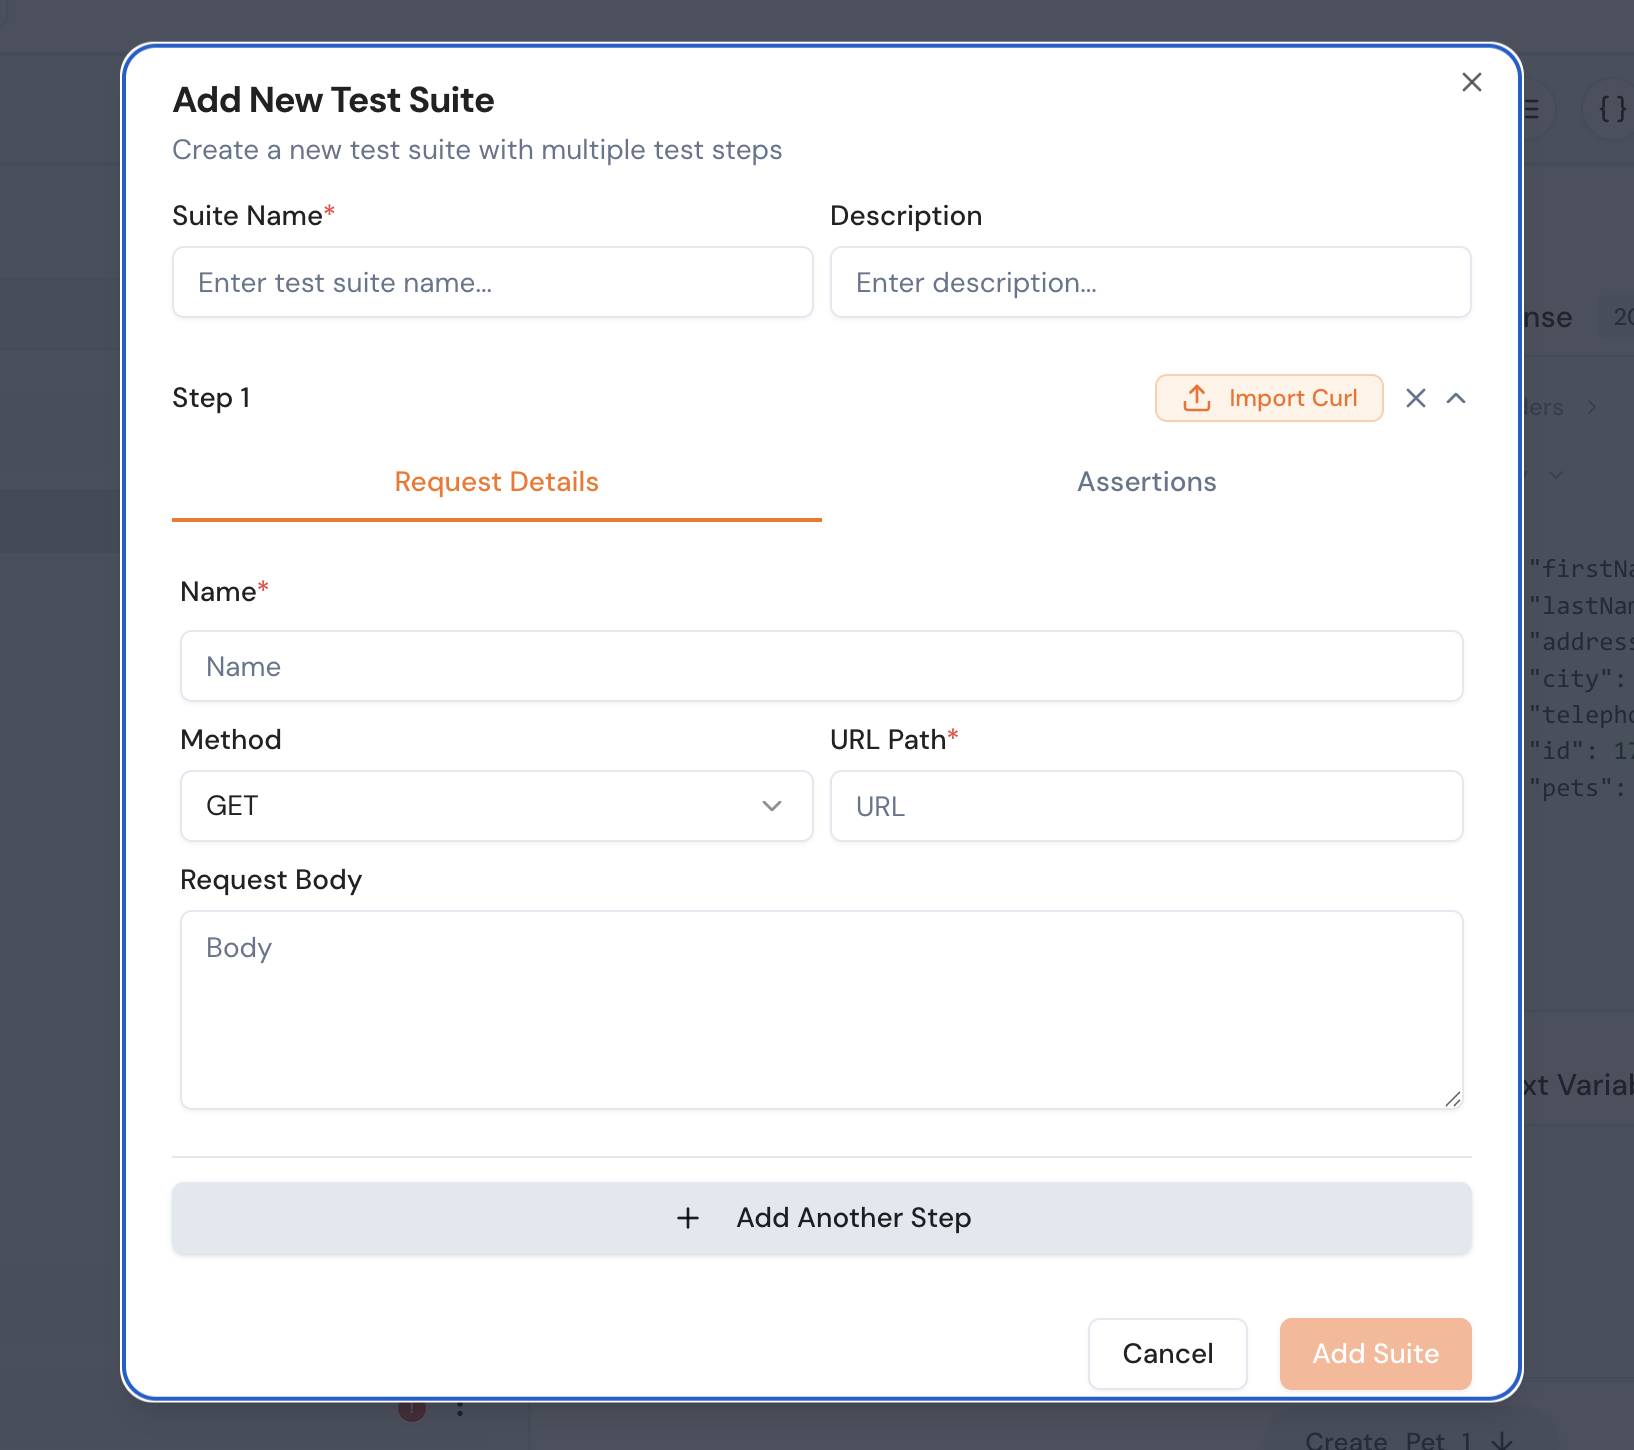
Provide Test Suite Details
- Fill in the following fields:
- Name: Enter a unique name for the test suite.
- Details: Provide a brief description of the test suite.
- Request: Specify the request details, such as the HTTP method, URL, headers, and body.
- Assertions: Define any Assertions related to the test suite.
- Fill in the following fields:
-
Import a Curl Command (Optional)
- If you have a curl command, you can directly import it to create the test suite.
- Paste the curl command in the provided input field.
- Keploy will automatically parse the curl command and populate the test suite details.
-
Save the Test Suite
- Once all the details are filled in, click on the
Savebutton to create the test suite.
- Once all the details are filled in, click on the
Example
Manual Entry
{
  "name": "User Authentication",
  "details": "Tests the login functionality.",
  "request": {
    "method": "POST",
    "url": "https://api.example.com/login",
    "headers": {
      "Content-Type": "application/json"
    },
    "body": {
      "username": "test_user",
      "password": "secure_password"
    }
  }
}
Importing a Curl Command
curl -X POST https://api.example.com/login \
  -H "Content-Type: application/json" \
  -d '{"username": "test_user", "password": "secure_password"}'
By following these steps, you can easily create and manage test suites in Keploy.