UI Testing quickstart: record your first flows in the dashboard
In this quickstart you add the Keploy capture SDK's ingest key to a small React shop, use the shop in your browser, and read each visit as UI flows in the Keploy dashboard: the steps you took on each page and the network calls those steps made. It takes about 10 minutes. The same steps work for your own web app.
UI Testing is in beta. Recording visits and reading them as flows and journeys works today. Replaying journeys as Playwright tests is in beta too, and its runner is not in a release build yet, so this quickstart stops at the flows. See what works today.
Before you begin
-
A Keploy account. Sign in at app.keploy.io.
-
An app to record into. UI Testing records into the app you select in the dashboard's header. If you have none, create one with the Public API: generate a token with the Write scope under Settings → API Keys → Generate new token, then run:
curl -X POST https://api.keploy.io/client/v1/apps \
  -H "Authorization: Bearer kep_YOUR_API_KEY" \
  -H "Content-Type: application/json" \
  -d '{"name": "docs-demo-shop"}'
An app's name cannot be changed later, and two apps cannot share one.
-
Permission to run test generation on the app (
testgen:run), which creating an ingest key needs. Viewing capture status and flows needs only view access to the app (app:view). -
Node.js 22.22 or later, npm and git, for the sample shop.
1. Get the sample shop
The React sample shop is a small shop built with React, Vite and React Router: Home, Products with a search box, Cart, Checkout and About. Its API runs inside Vite, so there is nothing else to start.
git clone https://github.com/keploy/samples-typescript && cd samples-typescript/ui-capture-react-shop
cp .env.example .env
npm ci
2. Open UI Testing → UI Flows
In the Keploy dashboard, select your app in the header, then open UI Testing → UI Flows in the left navigation.
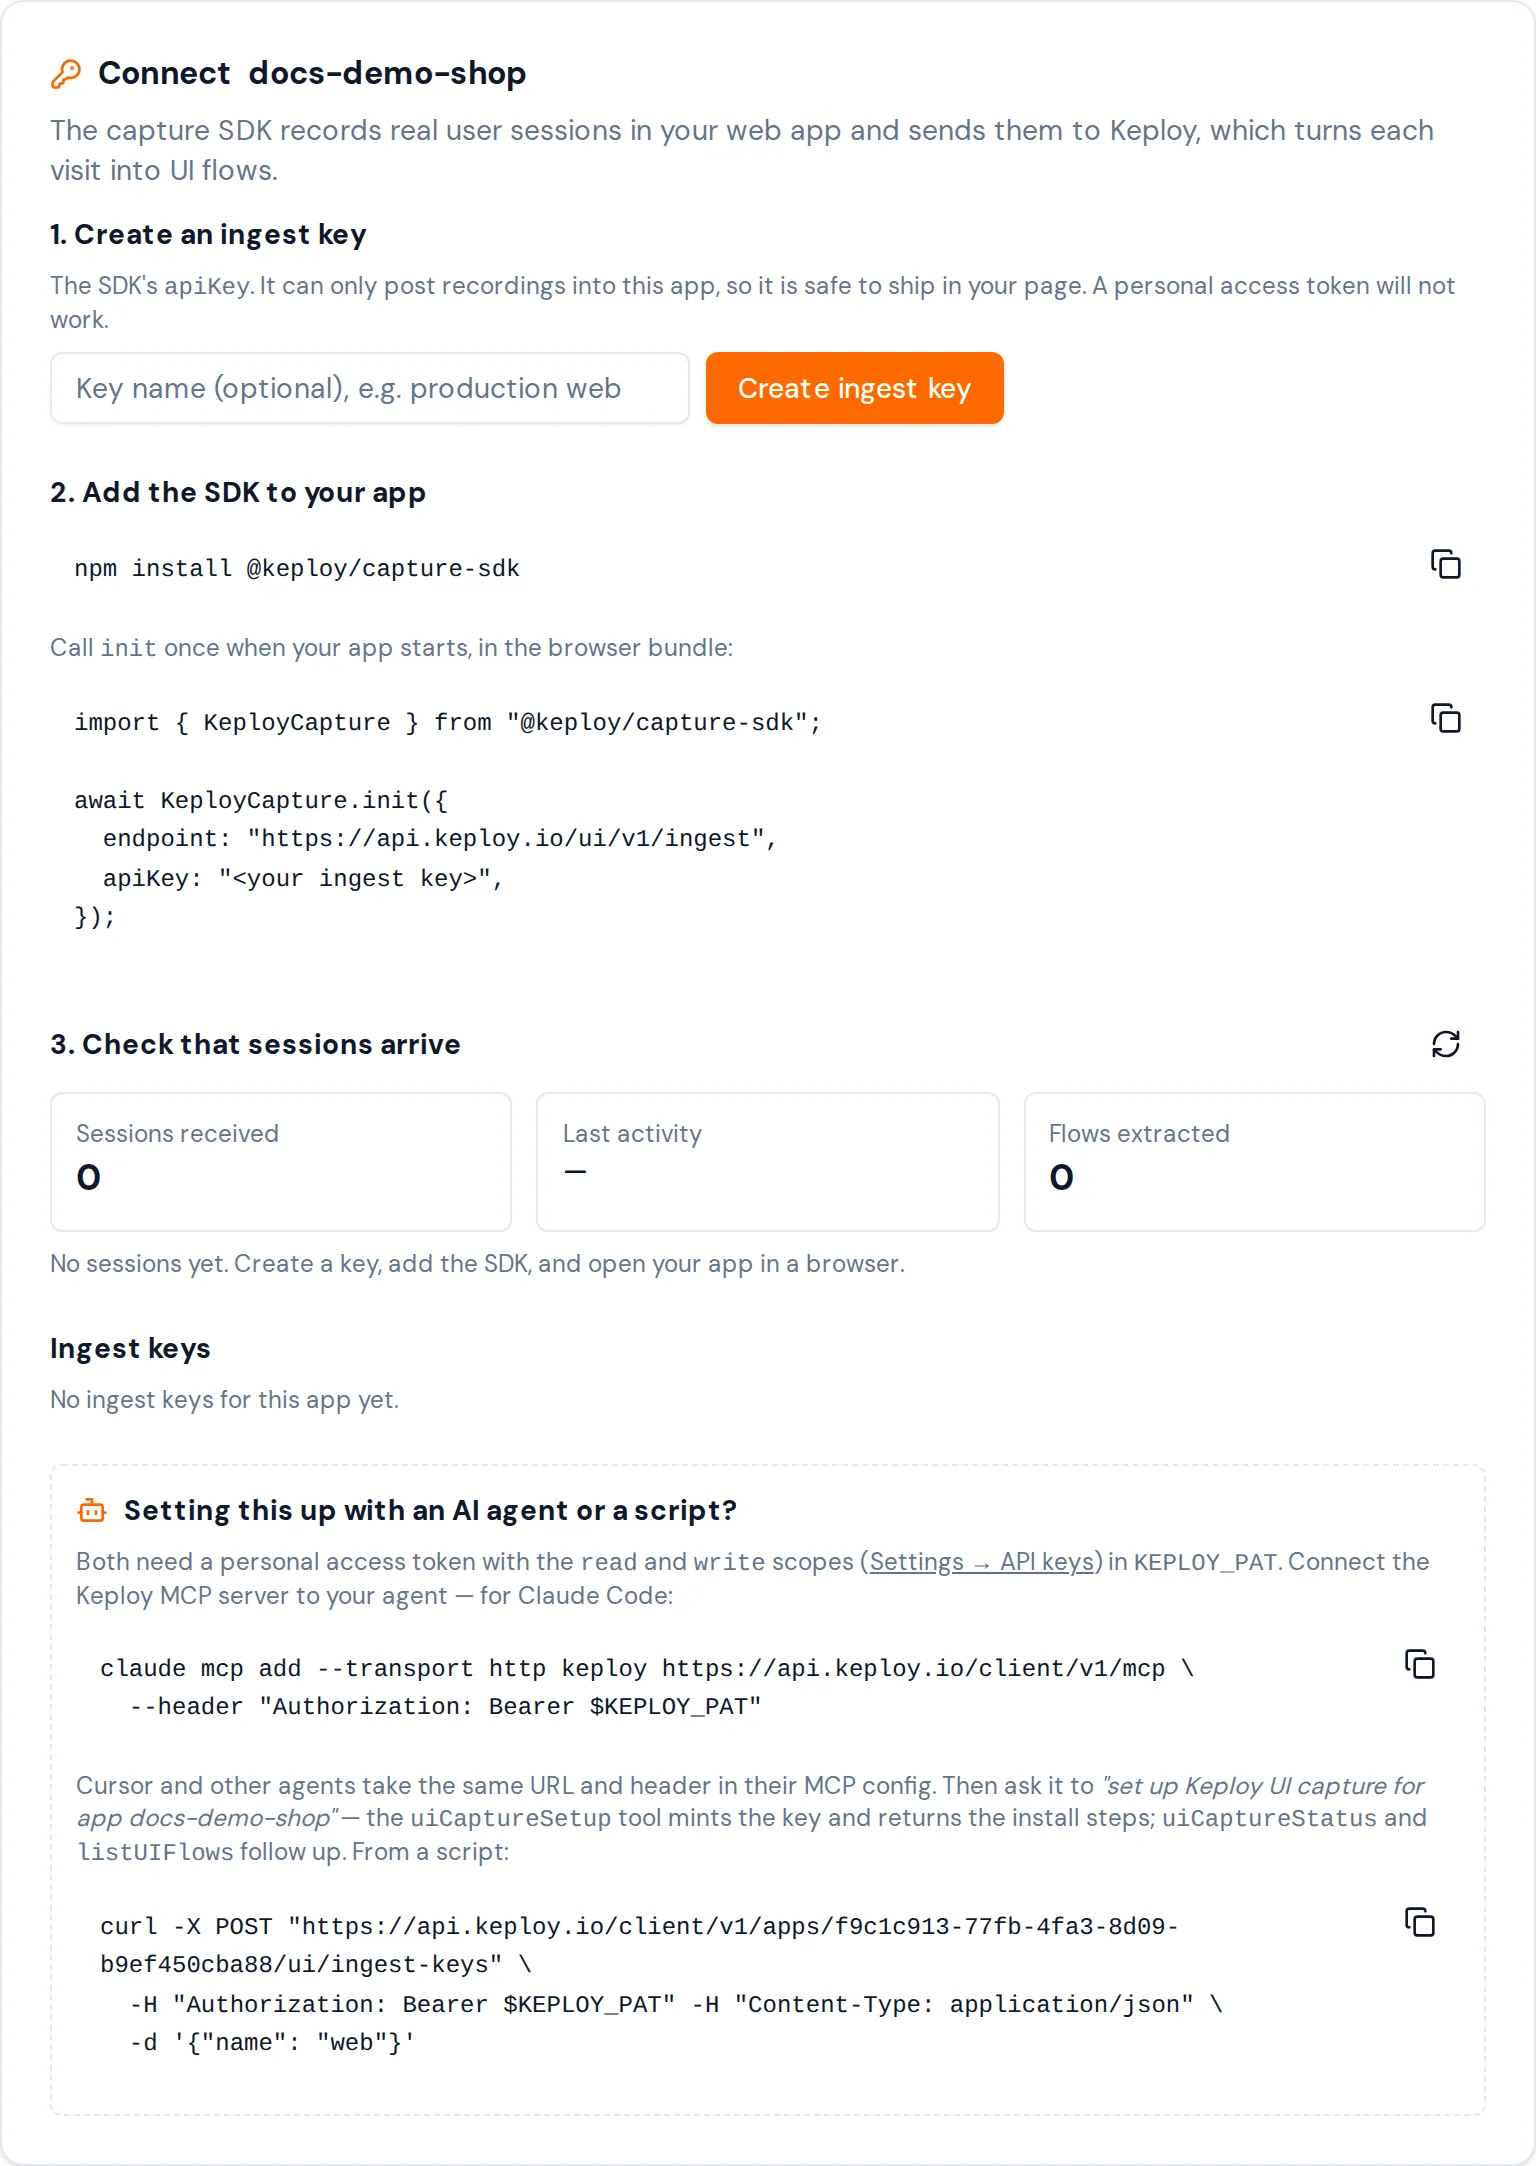
An app with no flows yet opens on Capture real user flows from your web app, with a setup card titled Connect and your app's name. Its three steps are the rest of this quickstart. Once the app has flows, the same card is under the Setup tab.
3. Create an ingest key
The SDK sends what it records with an ingest key. An ingest key can only post recordings into this one app, so it is safe to ship in your page's JavaScript. A personal access token does not work in its place.
- Under 1. Create an ingest key, optionally type a name for the key, for example
production web. Without one, the key is namedweband today's date. - Click Create ingest key. If you signed in more than 15 minutes ago, Keploy first asks you to Confirm it's you: click Sign in again and sign in.
- Copy the key. Copy this key now — it is shown only once. The snippet under 2. Add the SDK to your app now contains it, with the ingest endpoint for your Keploy server.
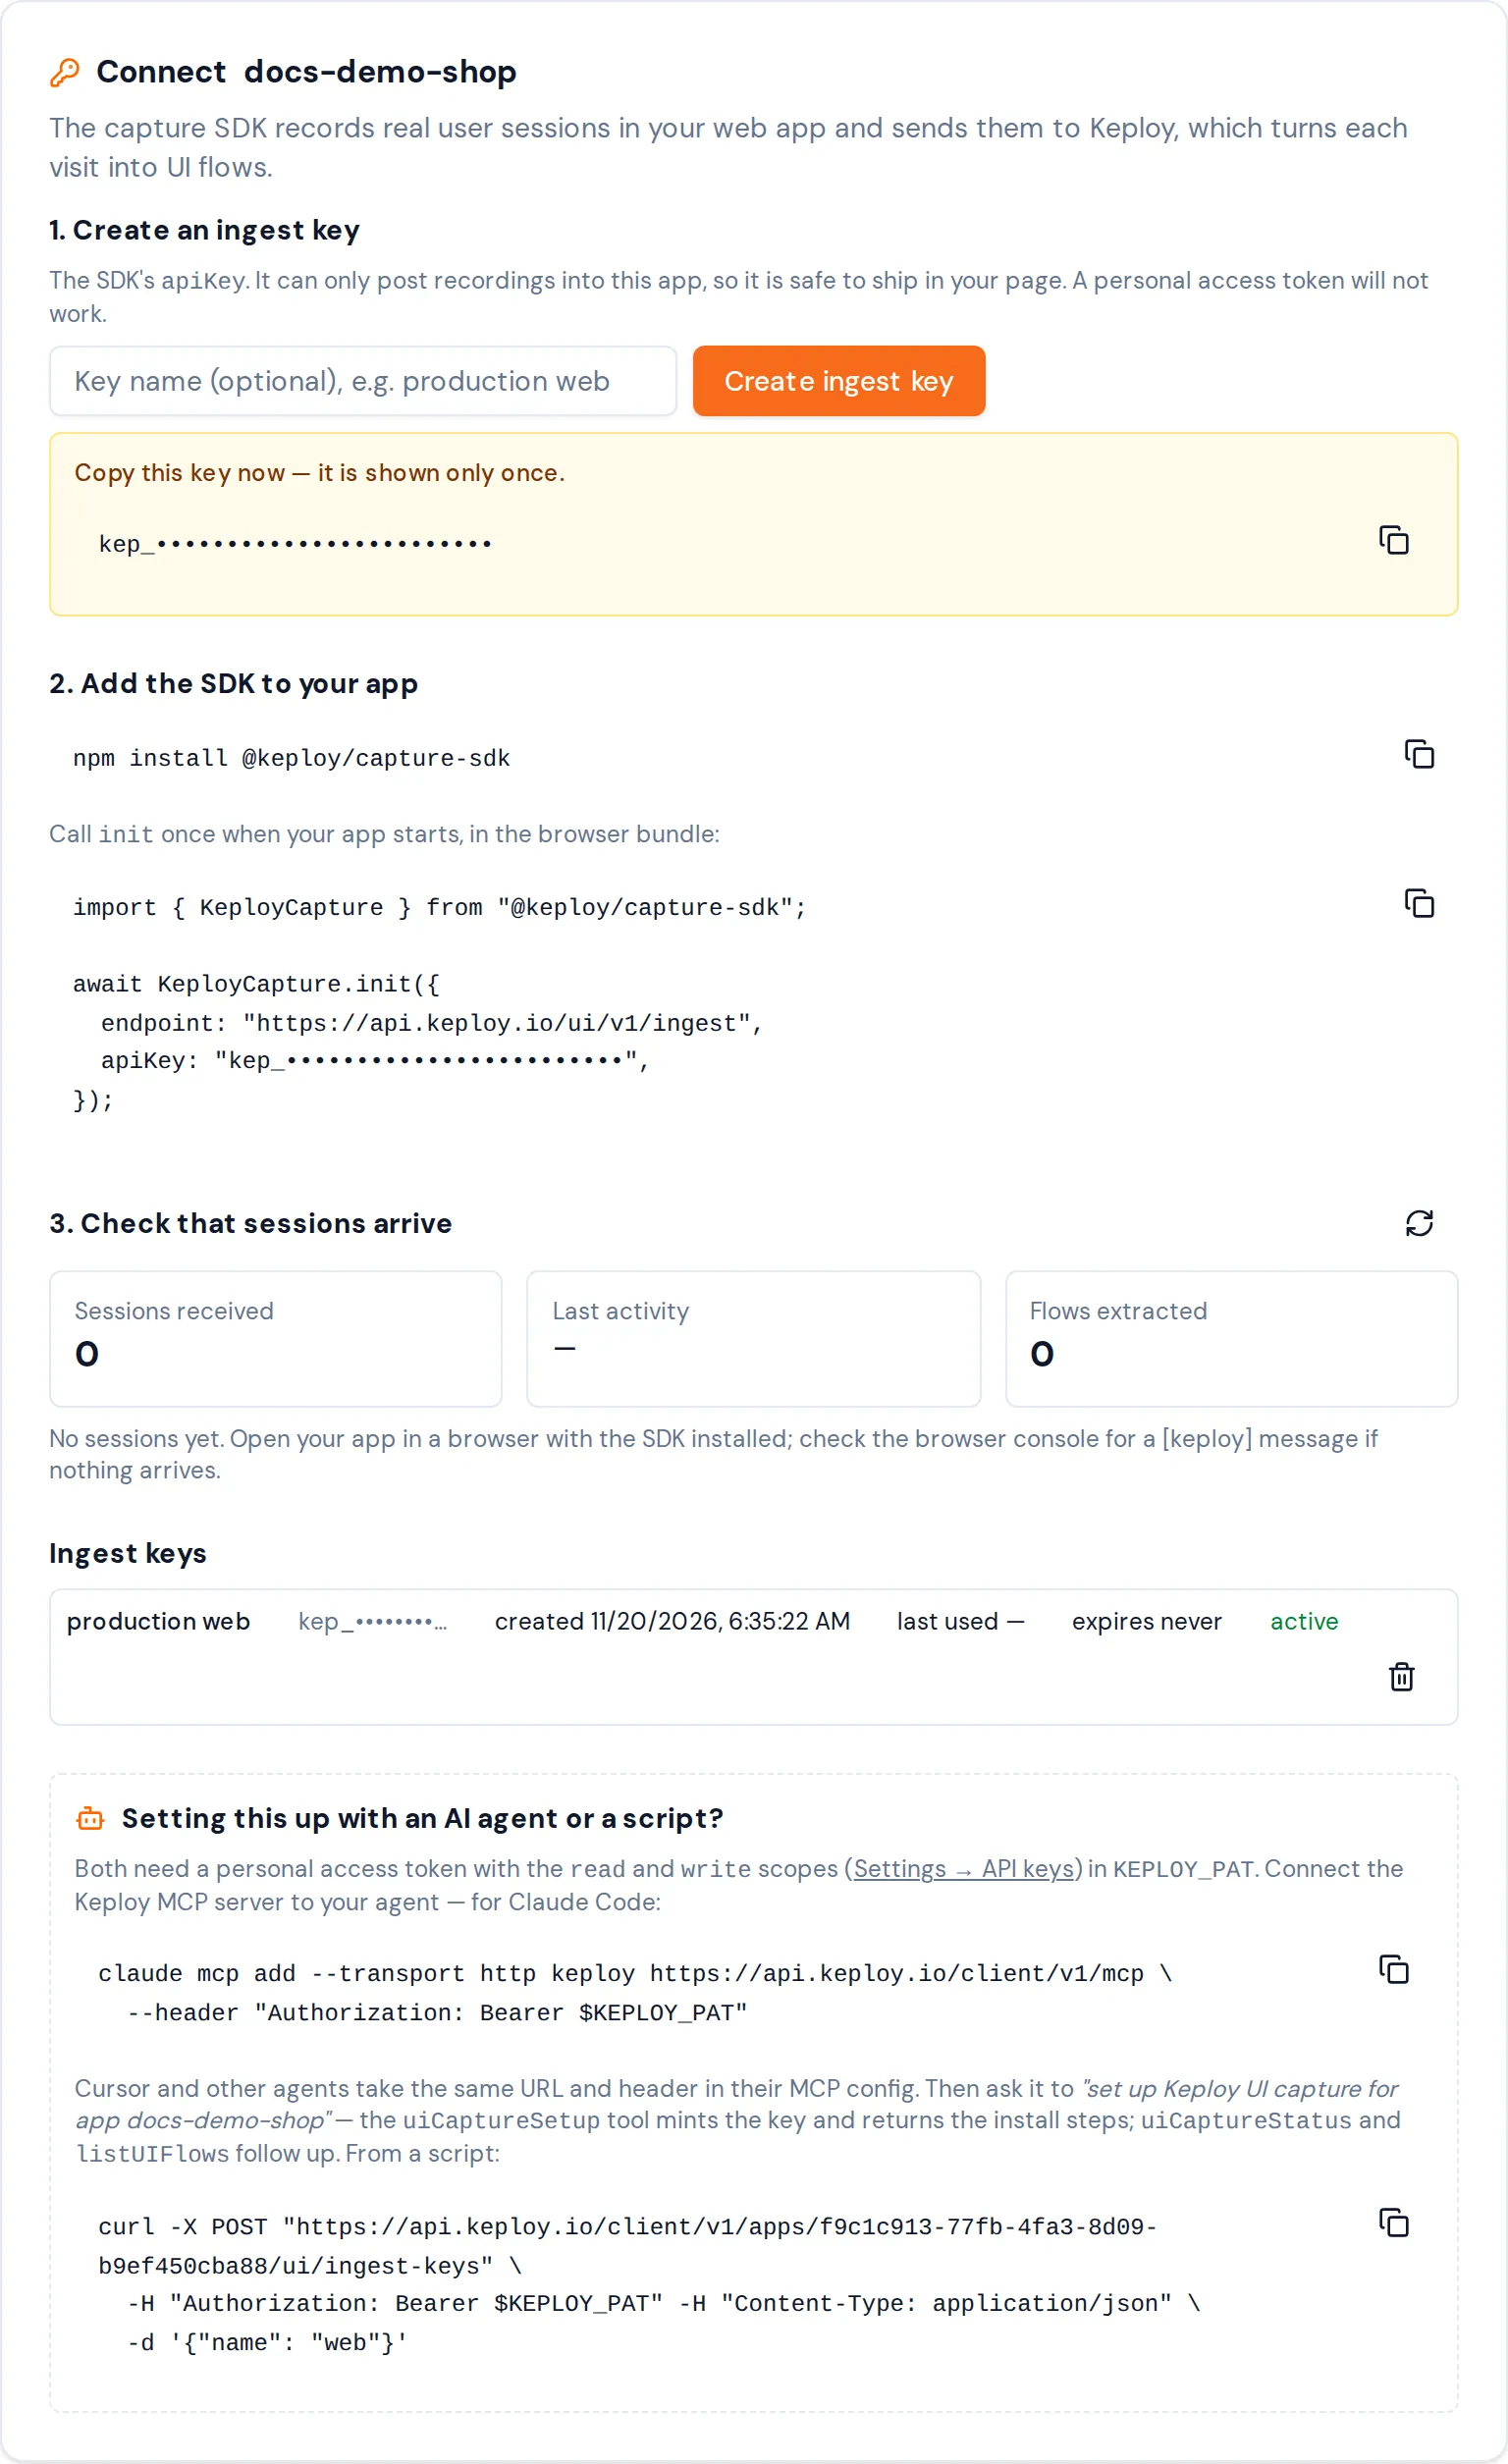
The key in the screenshot is blanked.
4. Add the key to the shop
Put the key in the shop's .env, in place of kep_YOUR_INGEST_KEY:
VITE_KEPLOY_INGEST_ENDPOINT=https://api.keploy.io/ui/v1/ingest
VITE_KEPLOY_INGEST_KEY=kep_YOUR_INGEST_KEY
The endpoint is Keploy Cloud's. If you self-host Keploy, use the endpoint in the card's snippet: your API server's URL followed by /ui/v1/ingest.
The shop already does what the card's step 2 says. It installs @keploy/capture-sdk, and src/main.tsx imports src/keploy.ts before anything else, so the capture starts before the app's own code runs. src/keploy.ts calls KeployCapture.init once, with the endpoint and key from .env:
await KeployCapture.init({
  endpoint,
  apiKey,
  // The default, written out: every typed value is masked, and the page's
  // visible text is kept. "strict" also masks all visible text and records
  // no request or response body.
  privacyMode: "balanced",
  privacy: {
    // Text that repeats what the shopper typed: the order confirmation
    // shows their email, so its text is masked.
    maskSelectors: ["[data-testid=order-confirmation]"],
    // Never recorded: the reviews (people's names) are replaced by an
    // empty box of the same size.
    blockSelectors: ["[data-testid=reviews]"],
    // A route whose path holds a credential, such as an invite link, is
    // declared so its value is kept out of every event. The shop has none:
    // secretRoutes: ["/invites/:key"],
  },
  onError(err) {
    // The visitor's browser sends Do Not Track or Global Privacy Control:
    // nothing is recorded, and nothing needs fixing.
    if (err.code === "KUI_E_CAPTURE_DECLINED") return;
    console.error(`[shop] Keploy UI capture stopped: ${err.code}`, err.message);
  },
});
The card's snippet sets only endpoint and apiKey. The shop also writes out privacyMode: "balanced", which is the default: every typed value is masked in the browser, and the page's visible text is kept. For a public site, consider "strict", which records no page text.
5. Use the shop
Build the shop and serve the build:
npm run build && npm run preview
Open http://localhost:4173 and shop: open Products, search for kettle, click Add to cart, open Cart, then Checkout.
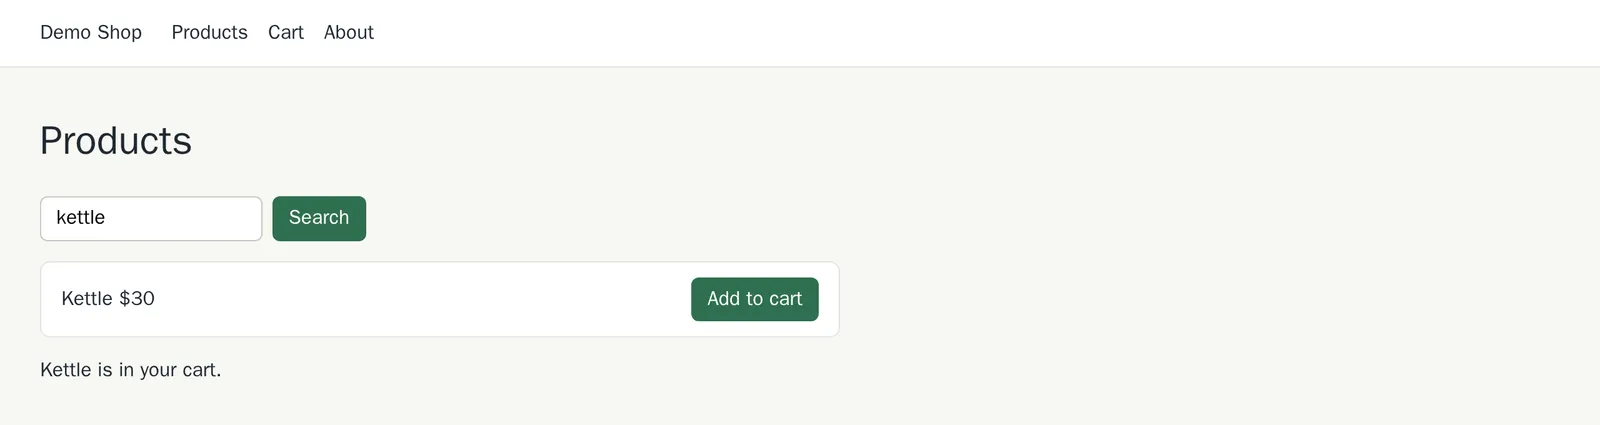
The production build is used because npm run dev runs React's development checks, which make every request twice, and the recording would show both.
To check that the SDK is recording, open the browser's developer tools:
- the console says
[shop] Keploy UI capture is recording session <id>; - while you click around, the Network tab shows a
POSTto/ui/v1/ingestevery few seconds, answered200.
6. Watch the sessions arrive
Back in the dashboard, the card's 3. Check that sessions arrive counts what has reached Keploy. It checks again every 30 seconds; the refresh icon next to the heading checks at once.
- Sessions received counts visits. One visit is one page load of the shop, its route changes included.
- Last activity is when the SDK last sent anything.
- Flows extracted goes up once a visit has ended and Keploy has turned it into flows.

A visit ends after 30 minutes without activity, and its flows follow within a few minutes. To see flows sooner, end the visit yourself. Copy its session id from the console line above, close the shop's tab (the SDK sends what it still holds as the page is left), then complete the session with the ingest key in X-API-Key:
curl -X POST https://api.keploy.io/ui/v1/sessions/<session id>/complete \
  -H "X-API-Key: kep_YOUR_INGEST_KEY"
Its flows follow within a minute or two. A tab left open on the completed session is refused at its next batch, and its capture ends with KUI_E_SESSION_CONFLICT. The shop's npm run demo:visits script does all of this for you: it drives five scripted visits, stops each one's capture and completes it. The walkthrough uses it.
7. See your flows
When the first flows exist, the line under the counts says Flows are ready — see the Flows tab. and the page switches to its tabs on its own. The Setup tab keeps the card.

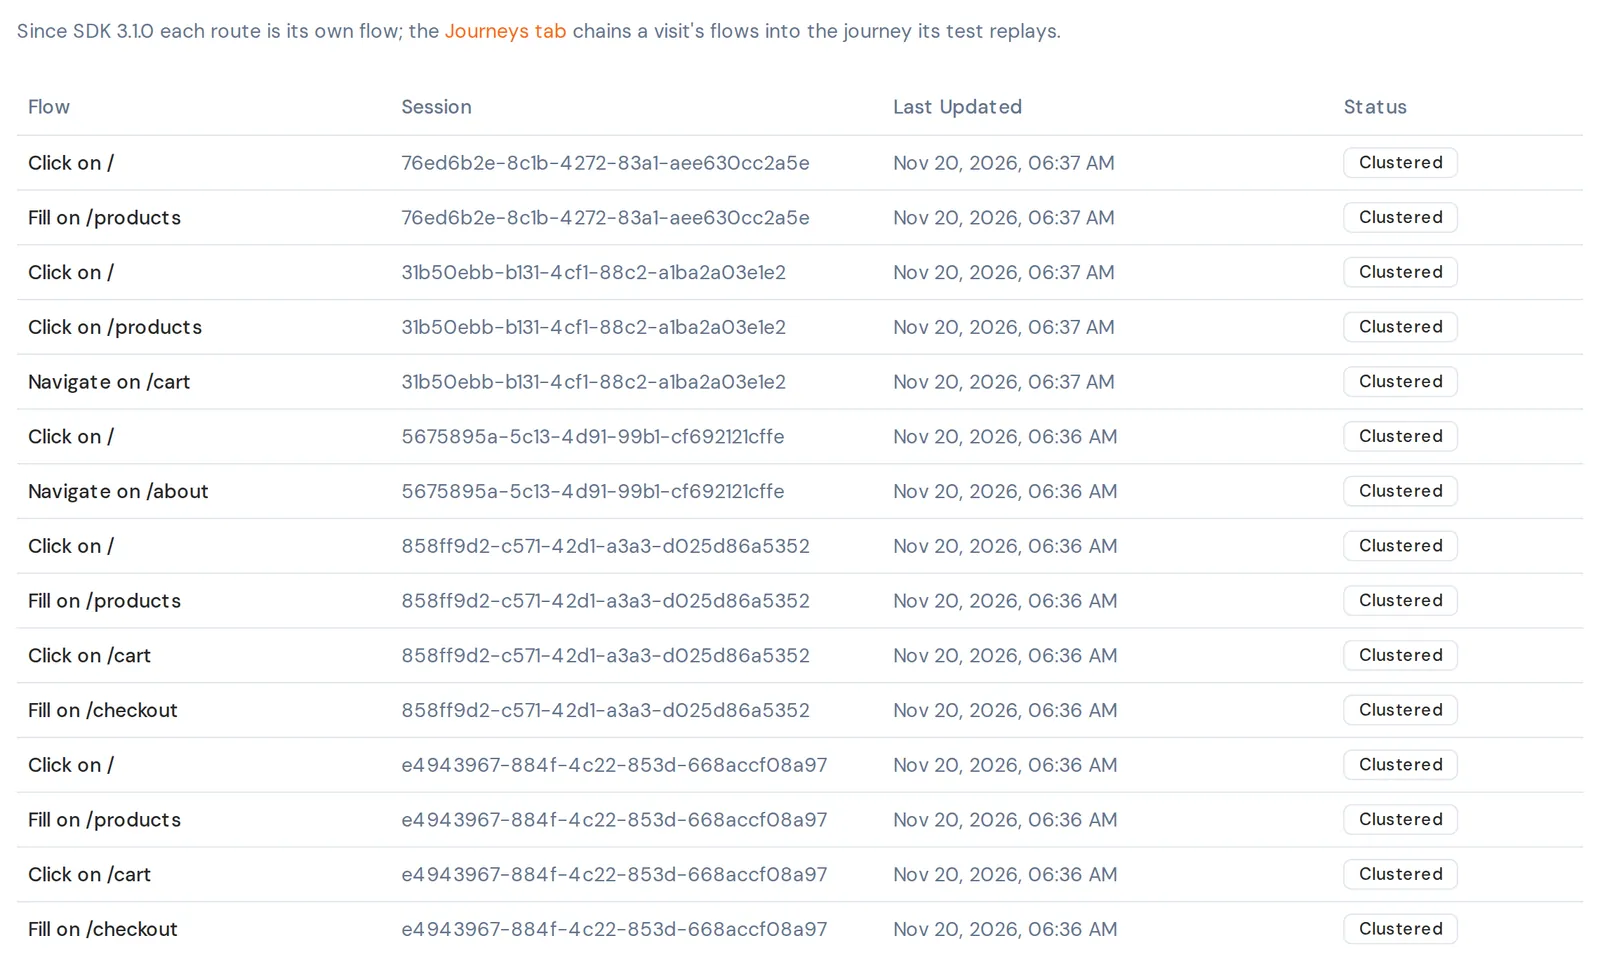
Open the Flows tab. Each row is one flow, with the session it came from, when it was last updated and its status. Since SDK 3.1.0 each route a visitor opens is its own flow, so one visit to Products, Cart and Checkout makes a flow for each page. Flow names are made from what happened and where, such as Fill on /products or Click on /cart.
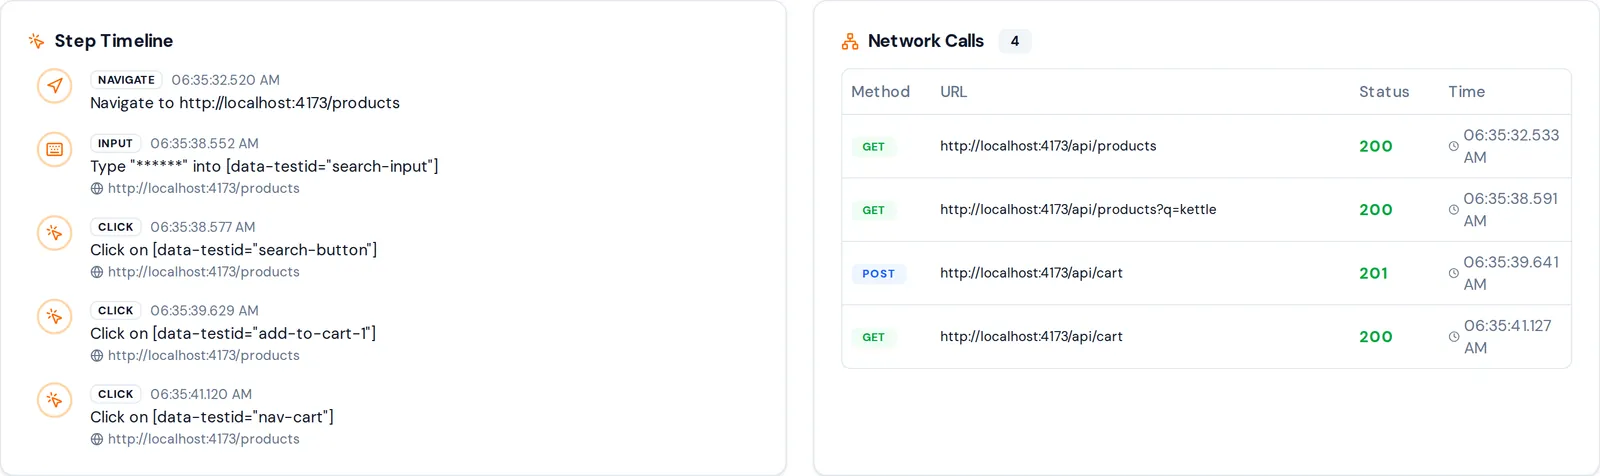
Click a flow to open it. Its Step Timeline lists each step with its time and page, and Network Calls lists each call the steps made, with its method, URL, status and time. What you typed is masked: the search for kettle shows as six asterisks.
Some visitors never show up
The SDK honours Do Not Track and Global Privacy Control by default (honorPrivacySignals: true). When a visitor's browser sends either signal, init() records, patches and sends nothing for that visitor, and the SDK reports KUI_E_CAPTURE_DECLINED to onError and once in the console. Brave and DuckDuckGo send Global Privacy Control by default, so visits from those browsers never appear.
This is not an error to fix. Keep KUI_E_CAPTURE_DECLINED out of your error tracking, as the shop's onError does. Set honorPrivacySignals: false only where your site has its own lawful basis to record such visitors and says so in its privacy policy.
Next steps
- From first visit to journeys: record five visits along three paths, read their flows and journeys, read the same data from a script, and clean up.
- Install the SDK in your own app: the same
initcall, in your app's entry point. - UI Capture errors and warnings: what each
KUI_E_code the SDK reports means and how to fix it.