Kubernetes Live Record & Replay using Keploy Proxy
This guide demonstrates how to use Keploy Proxy to perform live traffic recording and replay in a Kubernetes environment.
Get the Sample Application
Start by cloning the e-commerce sample application repository and switching to the Kubernetes setup branch.
git clone https://github.com/keploy/ecommerce_sample_app.git
cd ecommerce_sample_app
git checkout k8s
This branch contains all Kubernetes manifests and configurations required for this guide.
Prerequisites
Make sure you have the following installed:
- Docker
- Kind
- kubectl
- Helm
Verify installations:
docker --version
kind --version
kubectl version --client
helm version
Deployment Steps
You can use the Keploy Kubernetes proxy with any Kubernetes cluster, whether it is running in production or in a local environment. For this quickstart, we use a local Kind cluster to provide an overview of how the Keploy Kubernetes proxy works.
We’ll use an e-commerce sample application deployed on a local Kubernetes cluster (Kind) to demonstrate Keploy’s live record and replay capabilities with real microservices traffic.
Note: If you already have a Kubernetes cluster running, you can skip the deployment steps.
1. Create a Kind Cluster
Create a local Kubernetes cluster named ecommerce:
kind create cluster --name ecommerce
2. Build Docker Images Locally
The application consists of multiple services. Build the Docker images locally so they can be used inside the Kind cluster.
docker build -t user-service:latest ./user_service
docker build -t product-service:latest ./product_service
docker build -t order-service:latest ./order_service
docker build -t apigateway:latest ./apigateway
3. Load Images into Kind
Since the Kubernetes manifests use imagePullPolicy: Never, the images must be manually loaded into the Kind cluster.
kind load docker-image user-service:latest --name ecommerce
kind load docker-image product-service:latest --name ecommerce
kind load docker-image order-service:latest --name ecommerce
kind load docker-image apigateway:latest --name ecommerce
Note
The
mysql:8.0andlocalstack/localstack:3.3images will be pulled automatically by Kind if not present locally. You may also load them manually to speed up cluster startup.
4. Deploy the Application
Apply all Kubernetes manifests:
kubectl apply -f k8s/
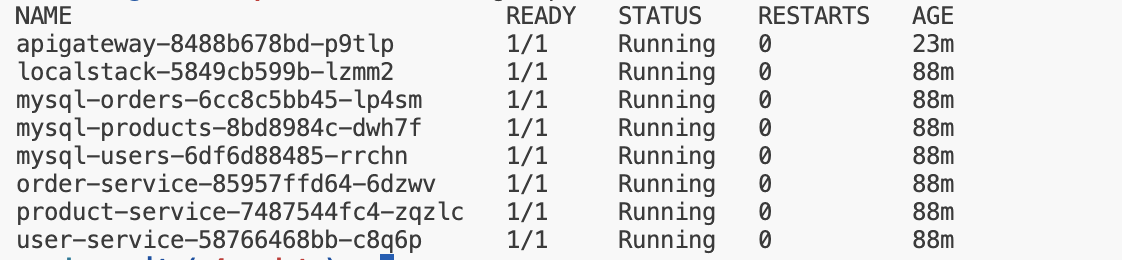
Check the status of pods:
kubectl get pods
Wait until all pods are in the Running state.
5. Access the Application
The API Gateway is exposed via a NodePort service.
For local environments use port-forwarding:
kubectl port-forward service/apigateway 8083:8083
Access the application at:
http://localhost:8083
At this point, your e-commerce application is live and ready to receive traffic.
Enable Live Record & Replay with Keploy Proxy
Pick a recording mode
The Keploy Proxy supports two ways to capture traffic from your application Pods. Both modes drive the same Console UI and REST API—the rest of this guide works identically in either case. Pick whichever fits your environment.
| Sidecar mode (default) | DaemonSet mode | |
|---|---|---|
| How traffic is captured | A keploy-agent sidecar container is injected into your application Pod via a MutatingAdmissionWebhook. The agent intercepts traffic alongside your container. | A keploy-daemonset Pod runs on each node and captures traffic from existing application Pods using eBPF—no sidecar, no application Pod restart. |
What happens on Start Recording | The proxy injects the agent and rolls the application Deployment. | The proxy creates a RecordingSession Custom Resource. The DaemonSet picks it up and programs its BPF target maps to capture matching Pods on each node. |
| Pod mutation on the application namespace | Required (patch on Deployments). | Not required. Application Pods are never modified. |
| Application restart at recording start | Yes, on first recording. | No. |
| Node kernel | Linux 5.10 or later. Low-latency mode needs 6.4 or later on arm64. | Linux 5.10 or later on x86-64, 6.4 or later on arm64. |
| Best for | Dev/staging, teams happy to grant write RBAC to Keploy on the application namespace. | Production with read-only RBAC on the application namespace; environments where rolling the application Pod has unacceptable cost; or when you want cluster-mode auto-replay (replay runs in a separate cluster you provide). |
The screenshots below show the Sidecar flow because that is the default. To use DaemonSet mode instead, set the daemonset values when you run the Helm command in step 4 below—every other step is identical.
1. Open Keploy Dashboard
Visit:
https://app.keploy.io
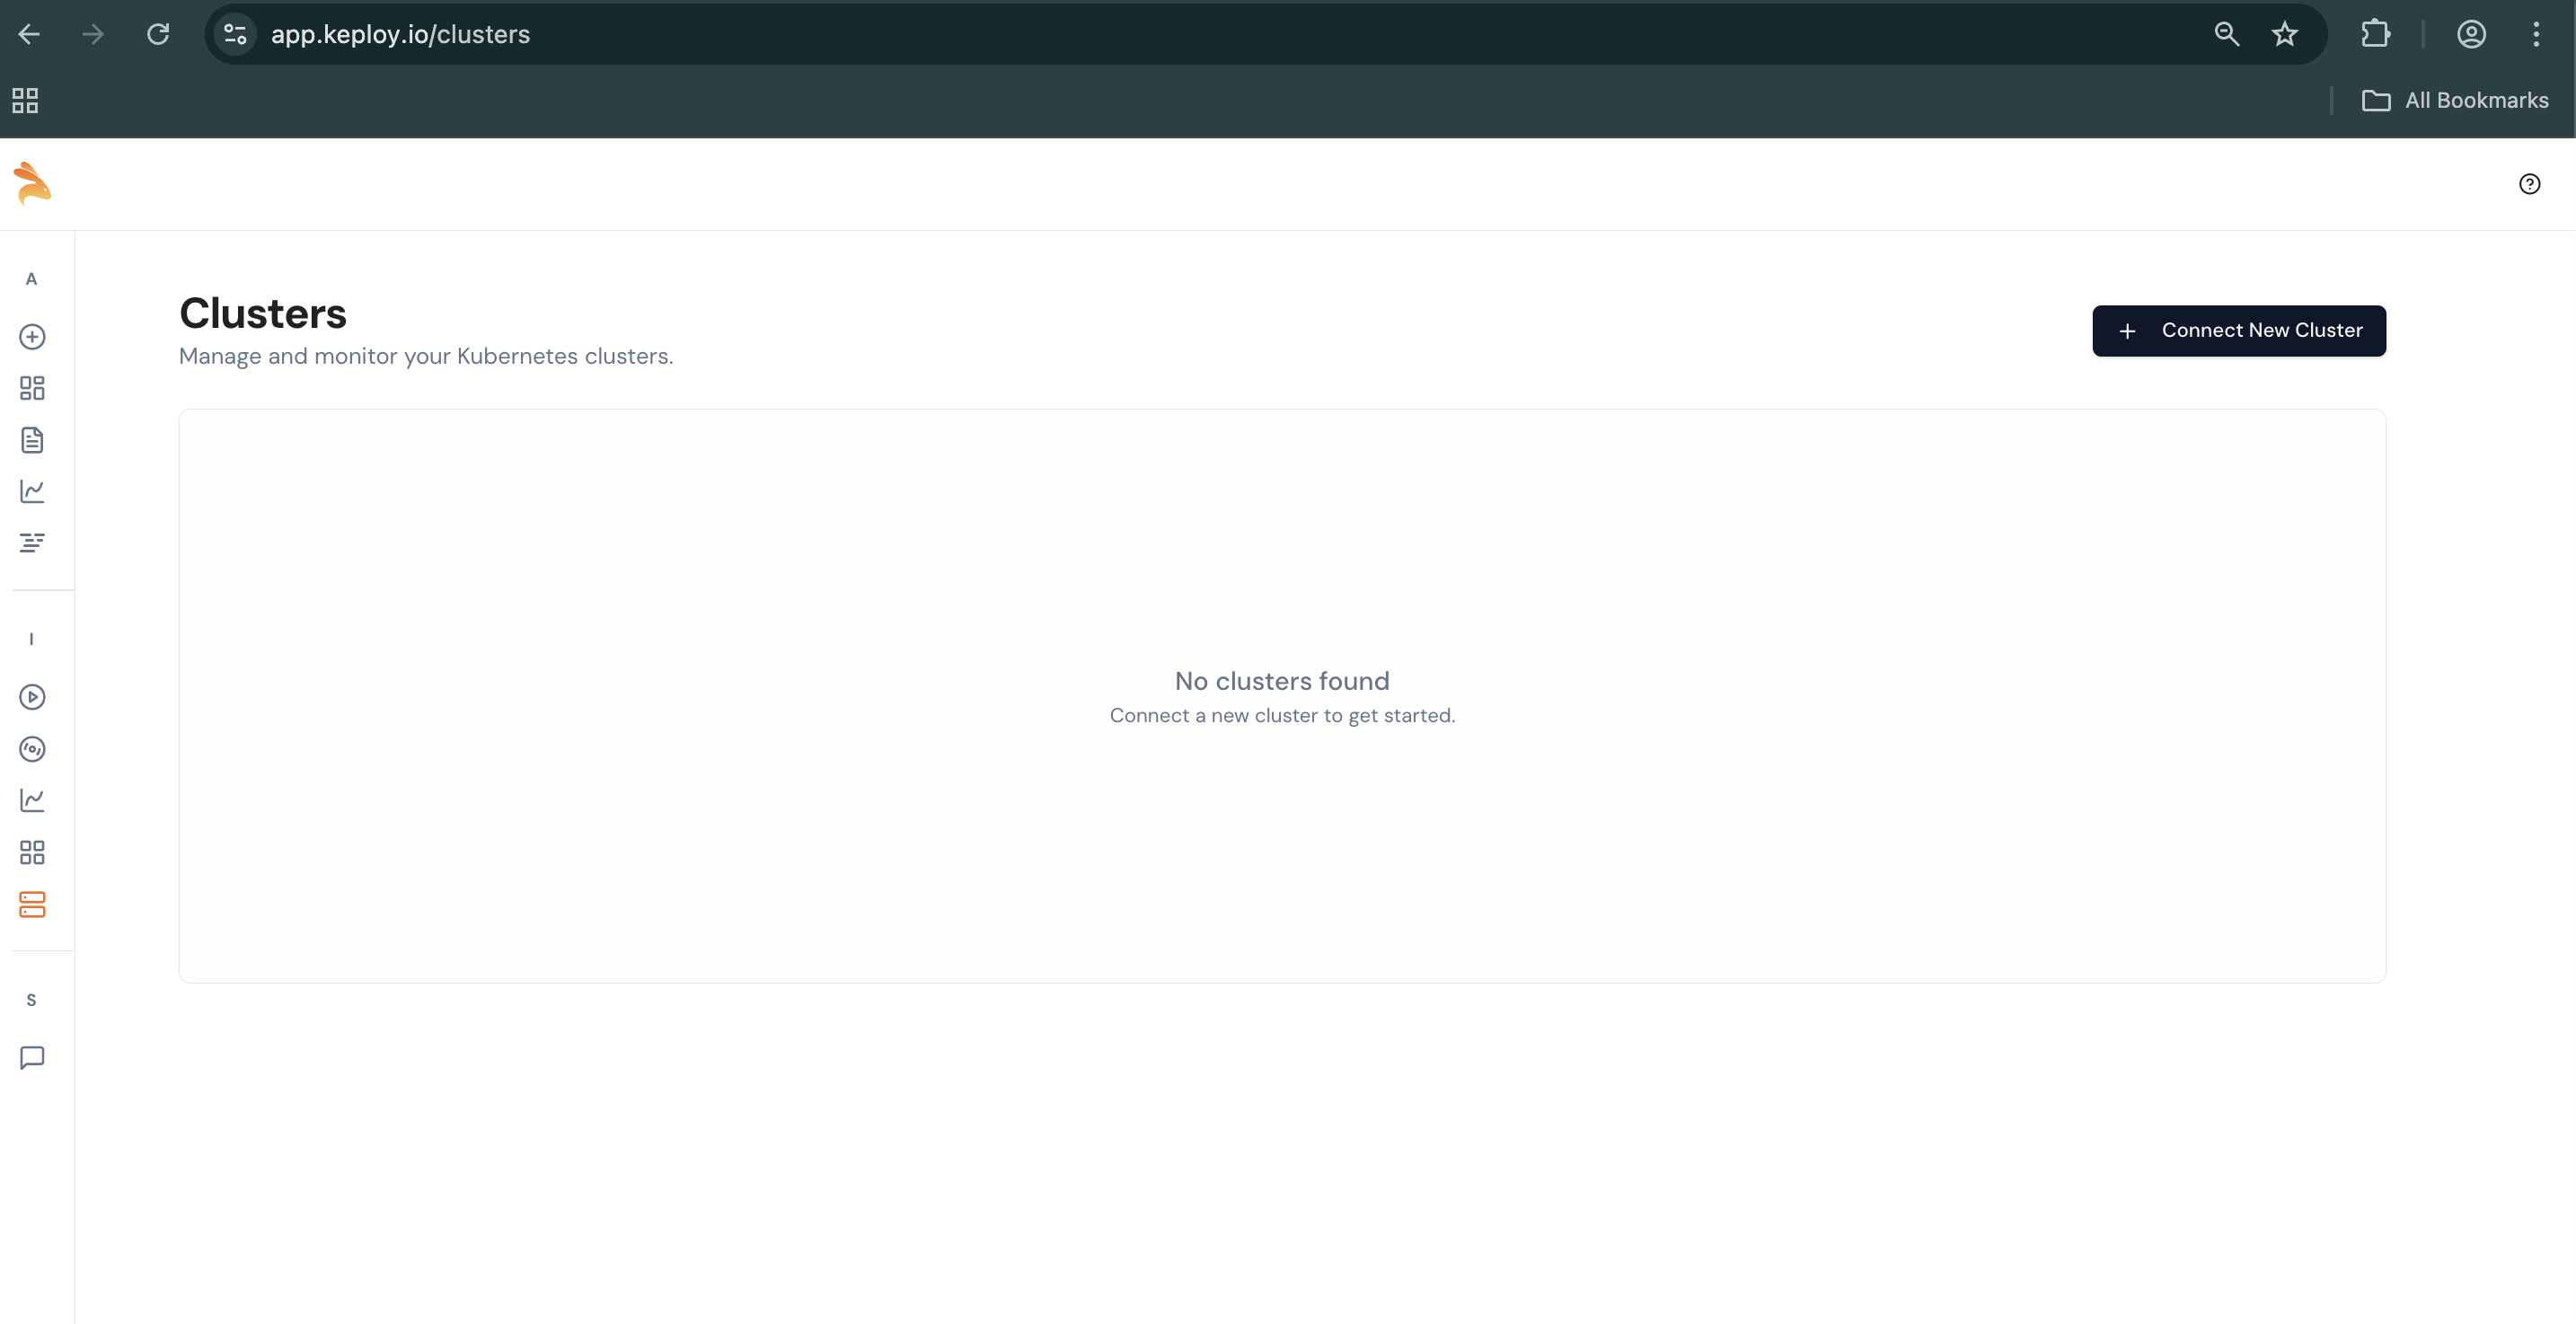
2. Add Your Kubernetes Cluster
- Navigate to Integration Testing
- Click on Clusters
- Connect a new cluster
3. Configure Cluster Details
Provide the following information:
-
Cluster Name:
ecommerce -
Ingress URL:
http://localhost:8080
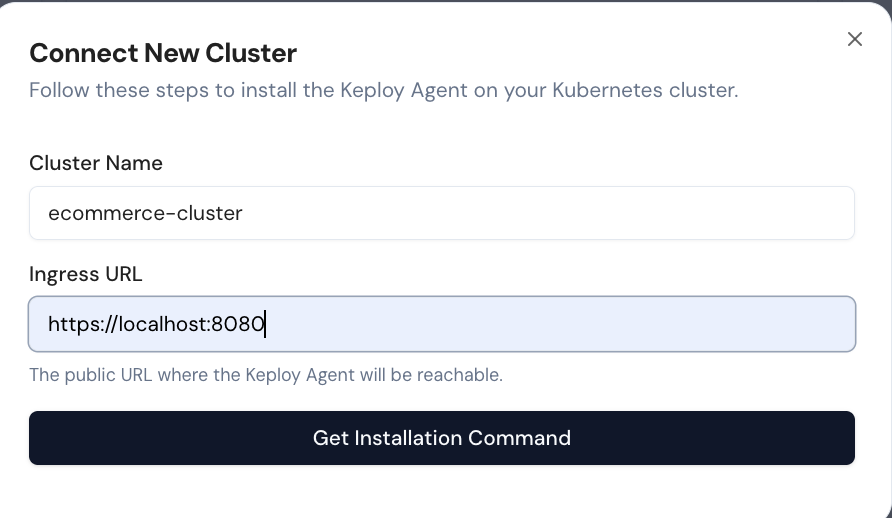
This allows the Keploy Proxy to observe and record live traffic from your Kubernetes application.
Note: For this quickstart, I am running it locally. If you are running your application in production, provide the necessary ingress URL.
4. Install the Keploy Proxy in your k8s Cluster
Once you have provided the cluster details, you can install the Keploy Proxy in your Kubernetes cluster using Helm.
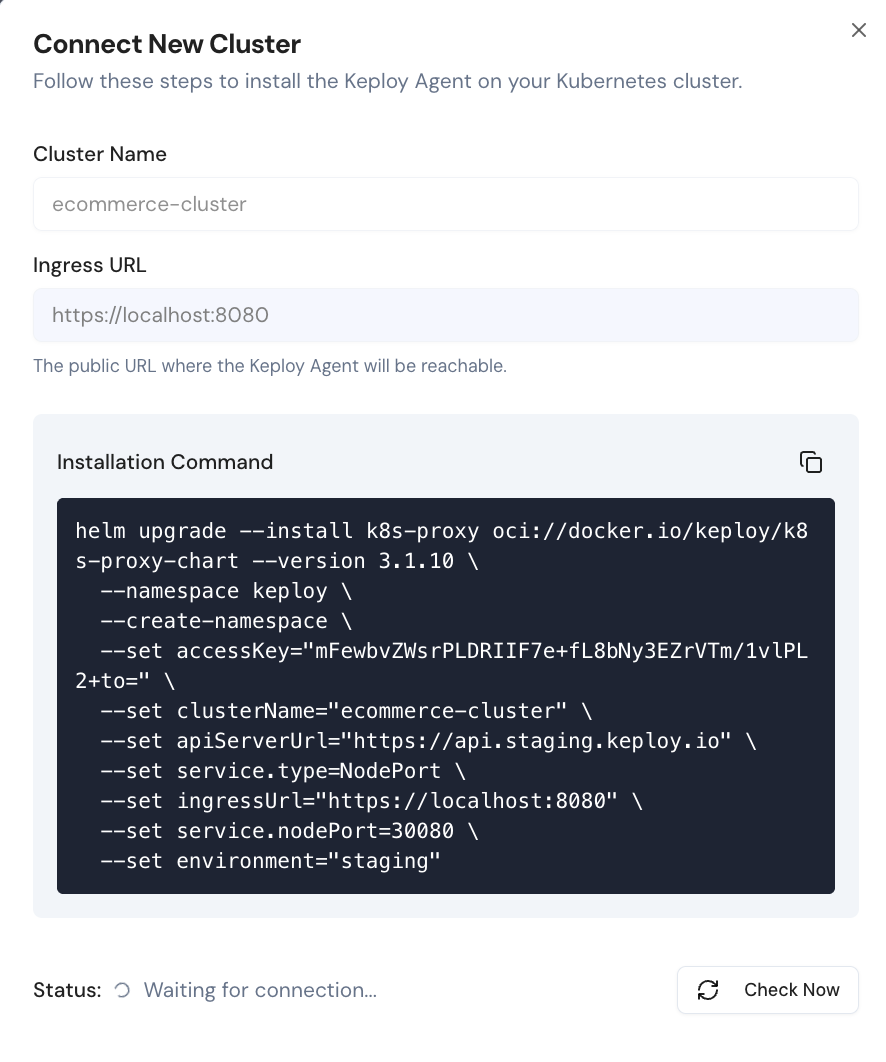
DaemonSet mode (optional)
If you want to use DaemonSet mode instead of the default Sidecar mode, append the daemonset values to the Helm command shown in the dashboard. The Helm chart installs the recordingsessions.keploy.io and replaysessions.keploy.io Custom Resource Definitions, and the per-node DaemonSet that performs the eBPF capture.
# add these flags to the Helm command from the dashboard:
  --set daemonset.enabled=true \
  --set daemonset.crds.install=true
The DaemonSet's eBPF capture needs a node kernel of 5.10 or later on x86-64, and 6.4 or later on arm64. On arm64 nodes with an older kernel, use Sidecar mode without low-latency mode.
After install you should see a per-node k8s-proxy-daemonset-* Pod alongside the regular proxy Deployment:
kubectl get pods -n keploy
# NAME                                 READY   STATUS    RESTARTS   AGE
# k8s-proxy-xxxxxxxxxx-xxxxx           1/1     Running   0          1m
# k8s-proxy-daemonset-xxxxx            1/1     Running   0          1m   ← per node
# k8s-proxy-daemonset-yyyyy            1/1     Running   0          1m
# k8s-proxy-mongodb-xxxxxxxxxx-xxxxx   1/1     Running   0          1m
# k8s-proxy-minio-xxxxxxxxxx-xxxxx     1/1     Running   0          1m
Verify the CRDs registered:
kubectl get crd | grep keploy.io
# recordingsessions.keploy.io   <date>
# replaysessions.keploy.io      <date>
The rest of this quickstart proceeds identically—the Console Start Recording button creates a RecordingSession CR which the DaemonSet picks up; you do not need to interact with the CR yourself.
5. Verify the Installation
Paste the Helm command into the terminal. Once the installation is complete, verify that the Keploy Proxy is running.
Note: The Keploy Proxy will be installed in the keploy namespace.
kubectl get pods -n keploy

Note: You need to port-forward the Keploy Proxy when running this setup on a local machine.
kubectl port-forward -n keploy svc/k8s-proxy 8080:8080
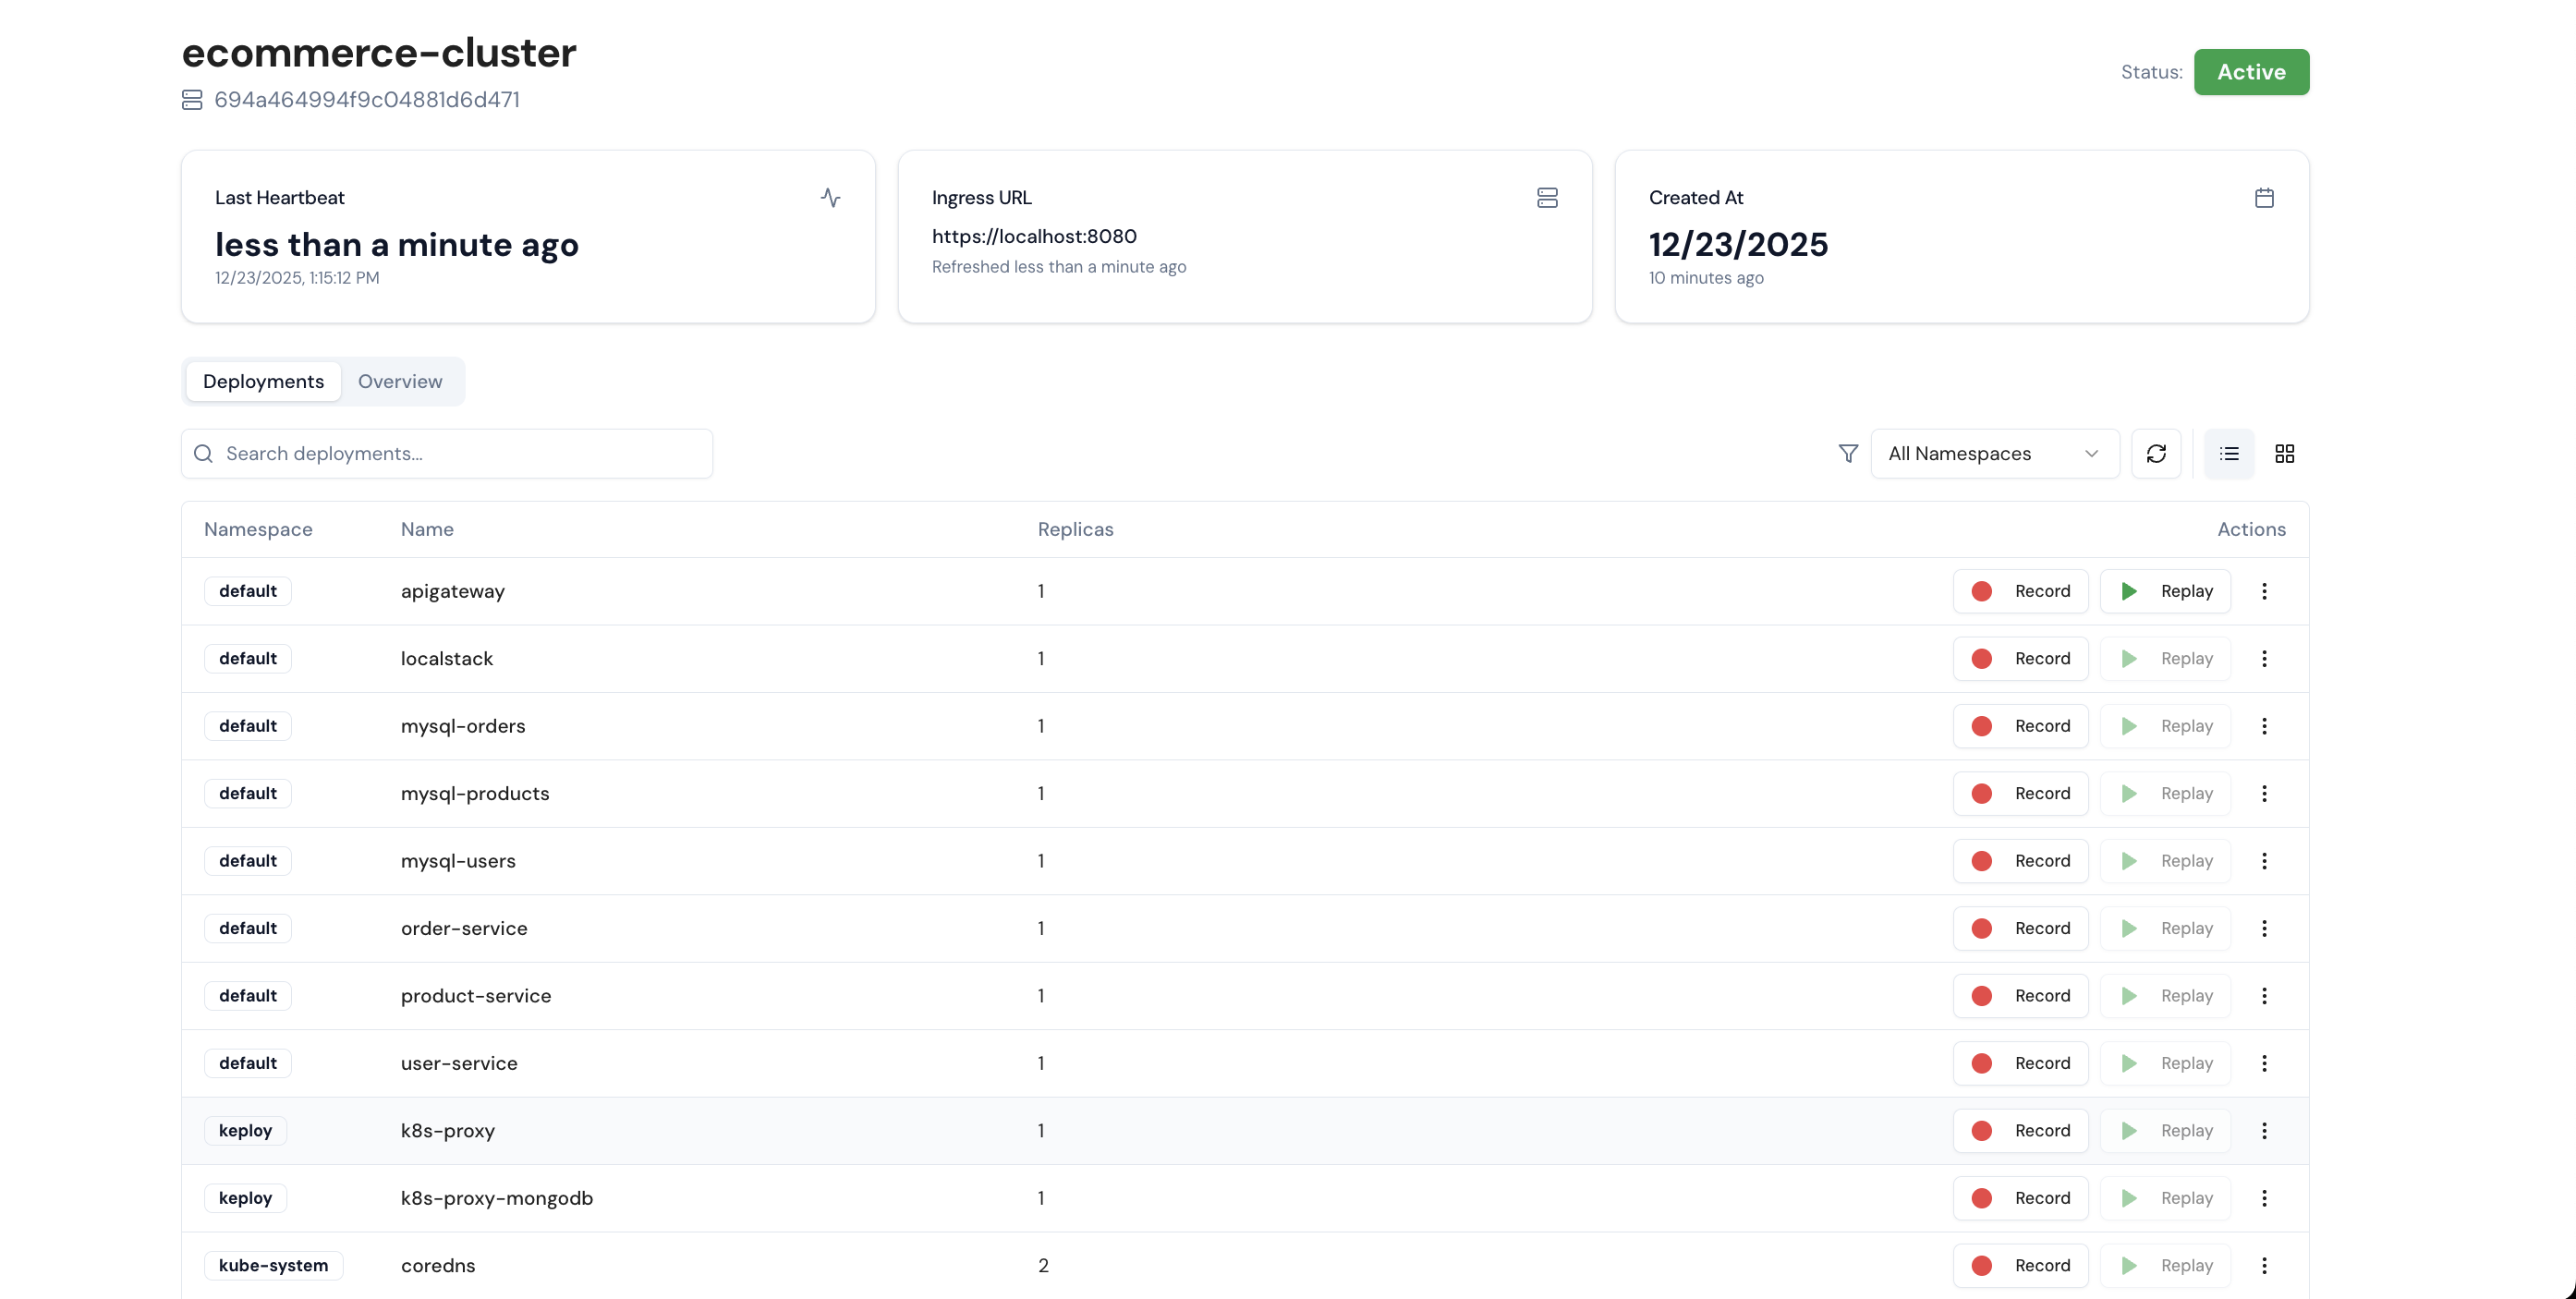
6. Your Keploy Proxy is ready to record live traffic
Once the Keploy Proxy is installed, you can view the list of running pods in the dashboard.
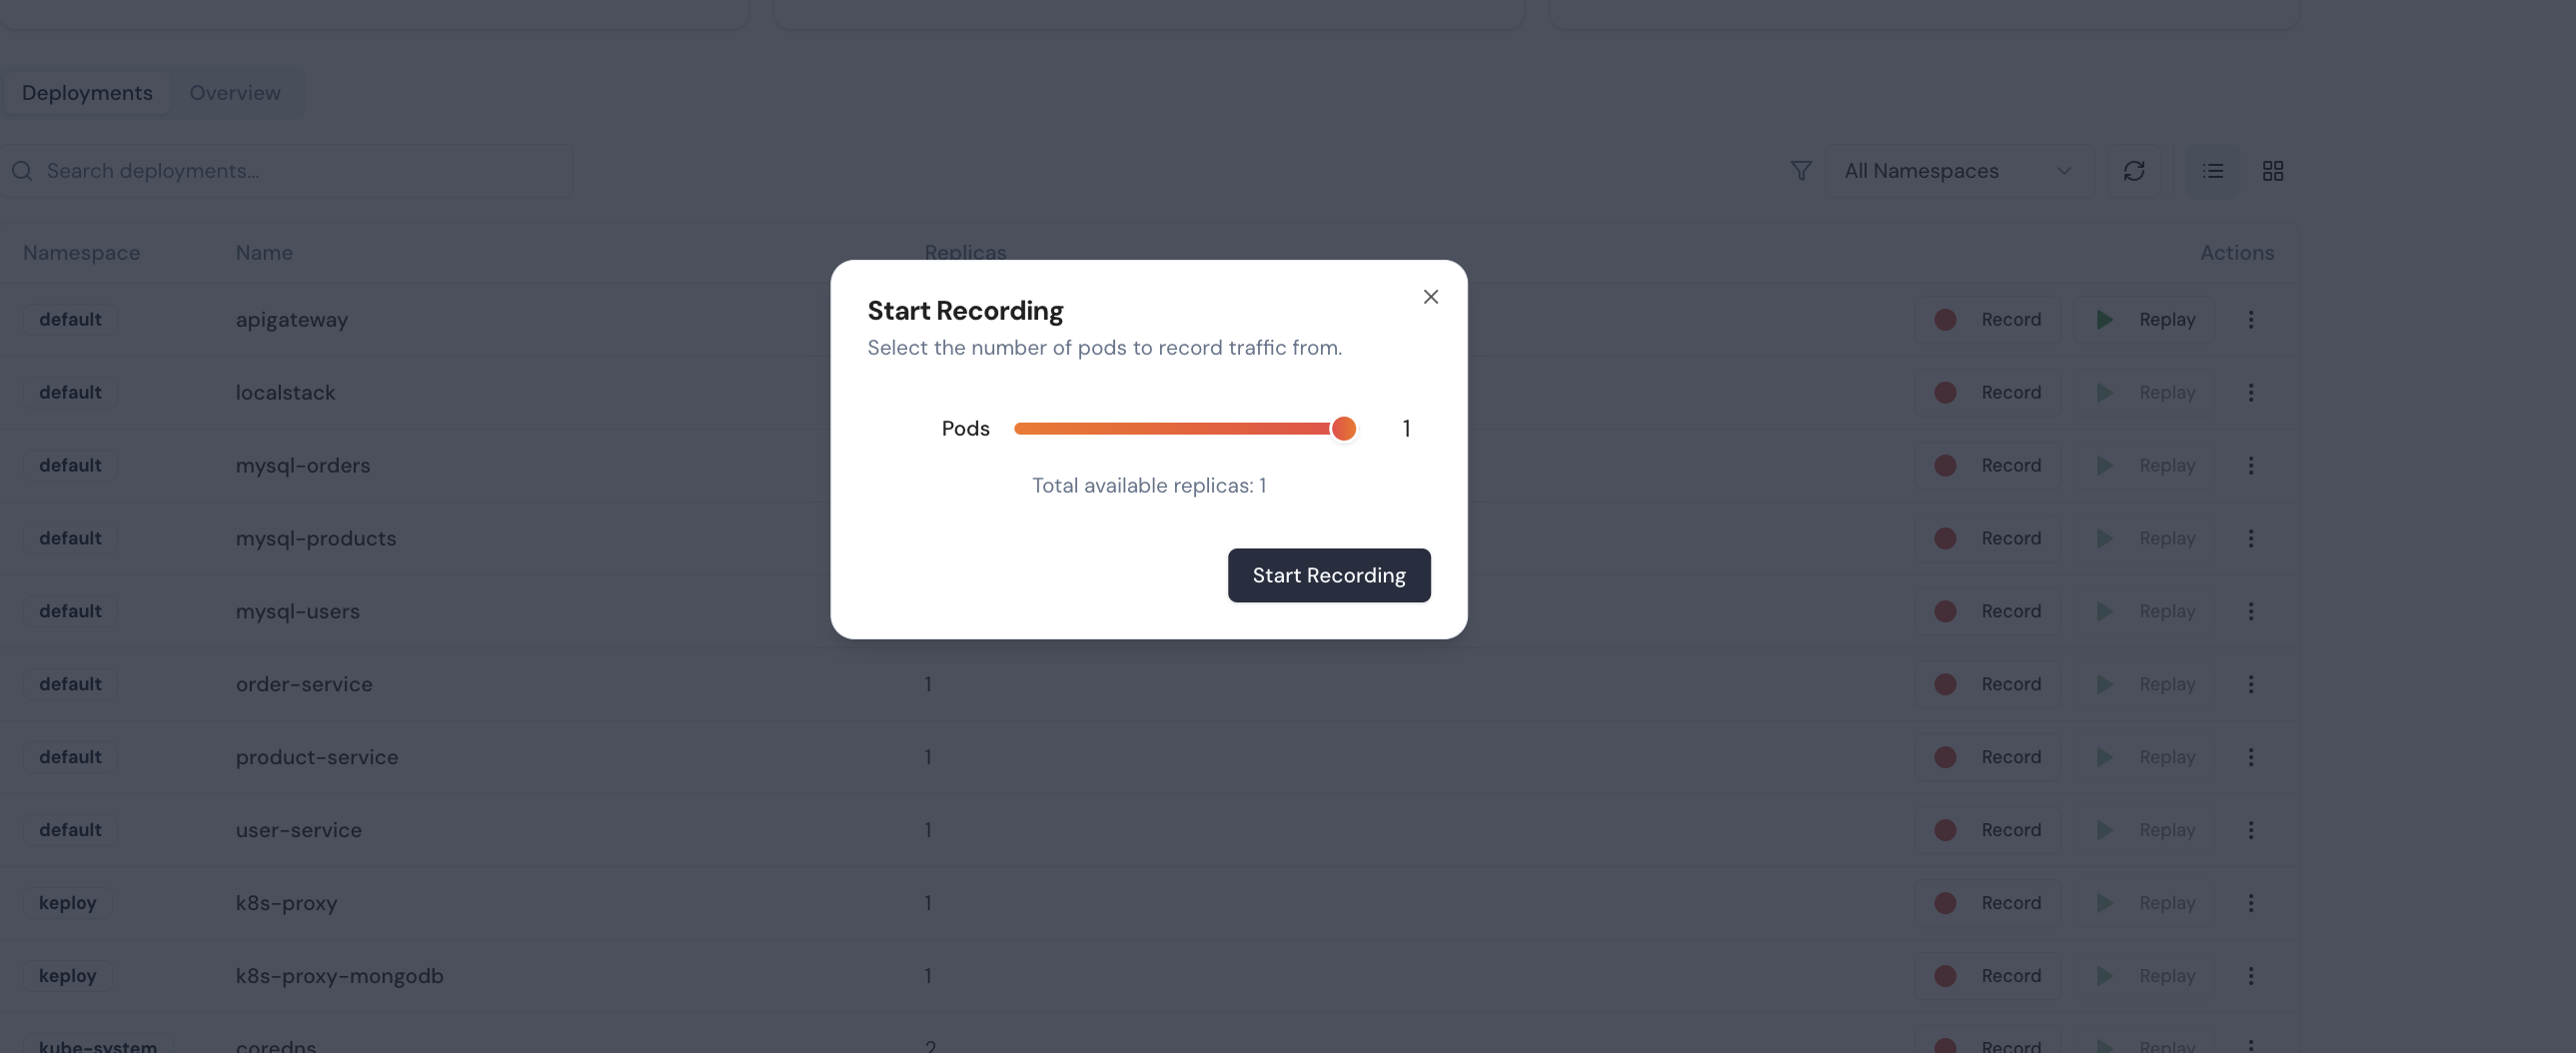
7. Start Recording
You can start recording live traffic from any of your pods by clicking Start Recording. For this quickstart, the apigateway pod is used.
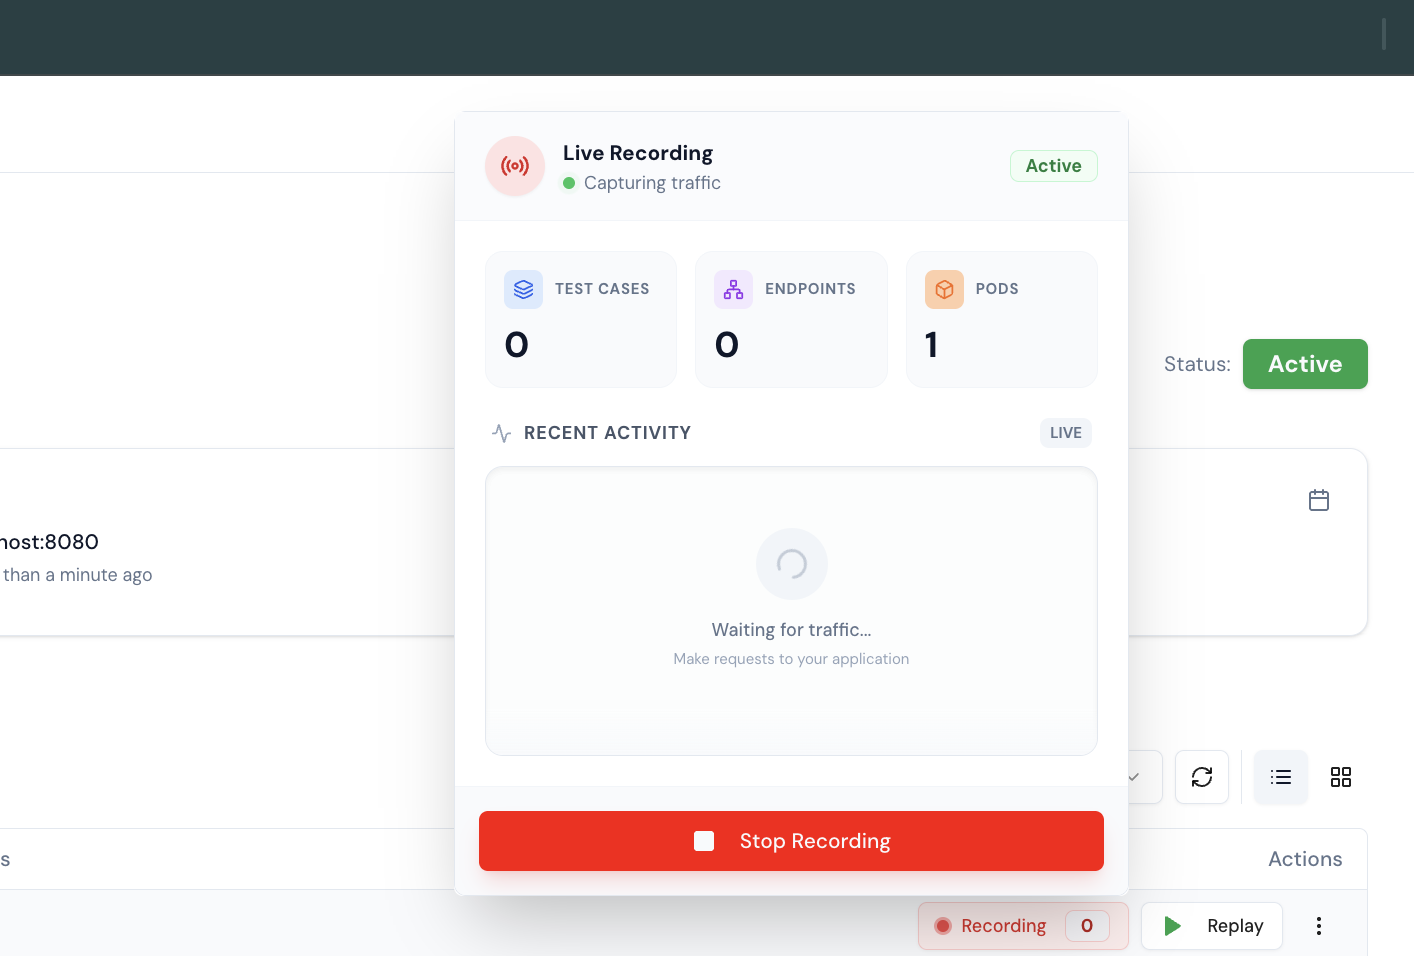
8. Keploy is ready to Capture Live Traffic
Send a request to your API Gateway pod, and Keploy will capture the traffic.
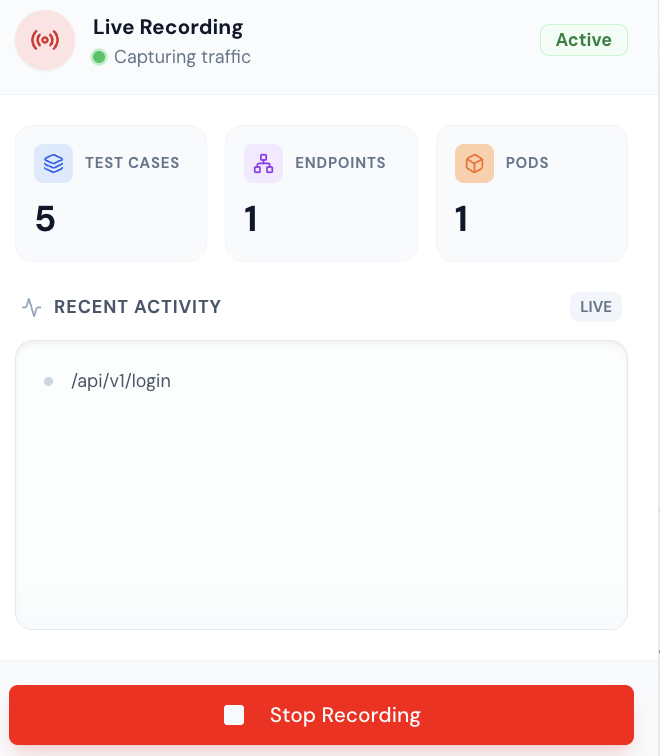
9. Record Live Traffic
Once you have sent a request to your API Gateway pod, you can see the live traffic being captured.
10. Stop Recording
Once you have sent a request to your API Gateway pod, you can stop recording by clicking Stop Recording. To view the list of recordings, navigate to the recordings page, where you can see the captured traffic.
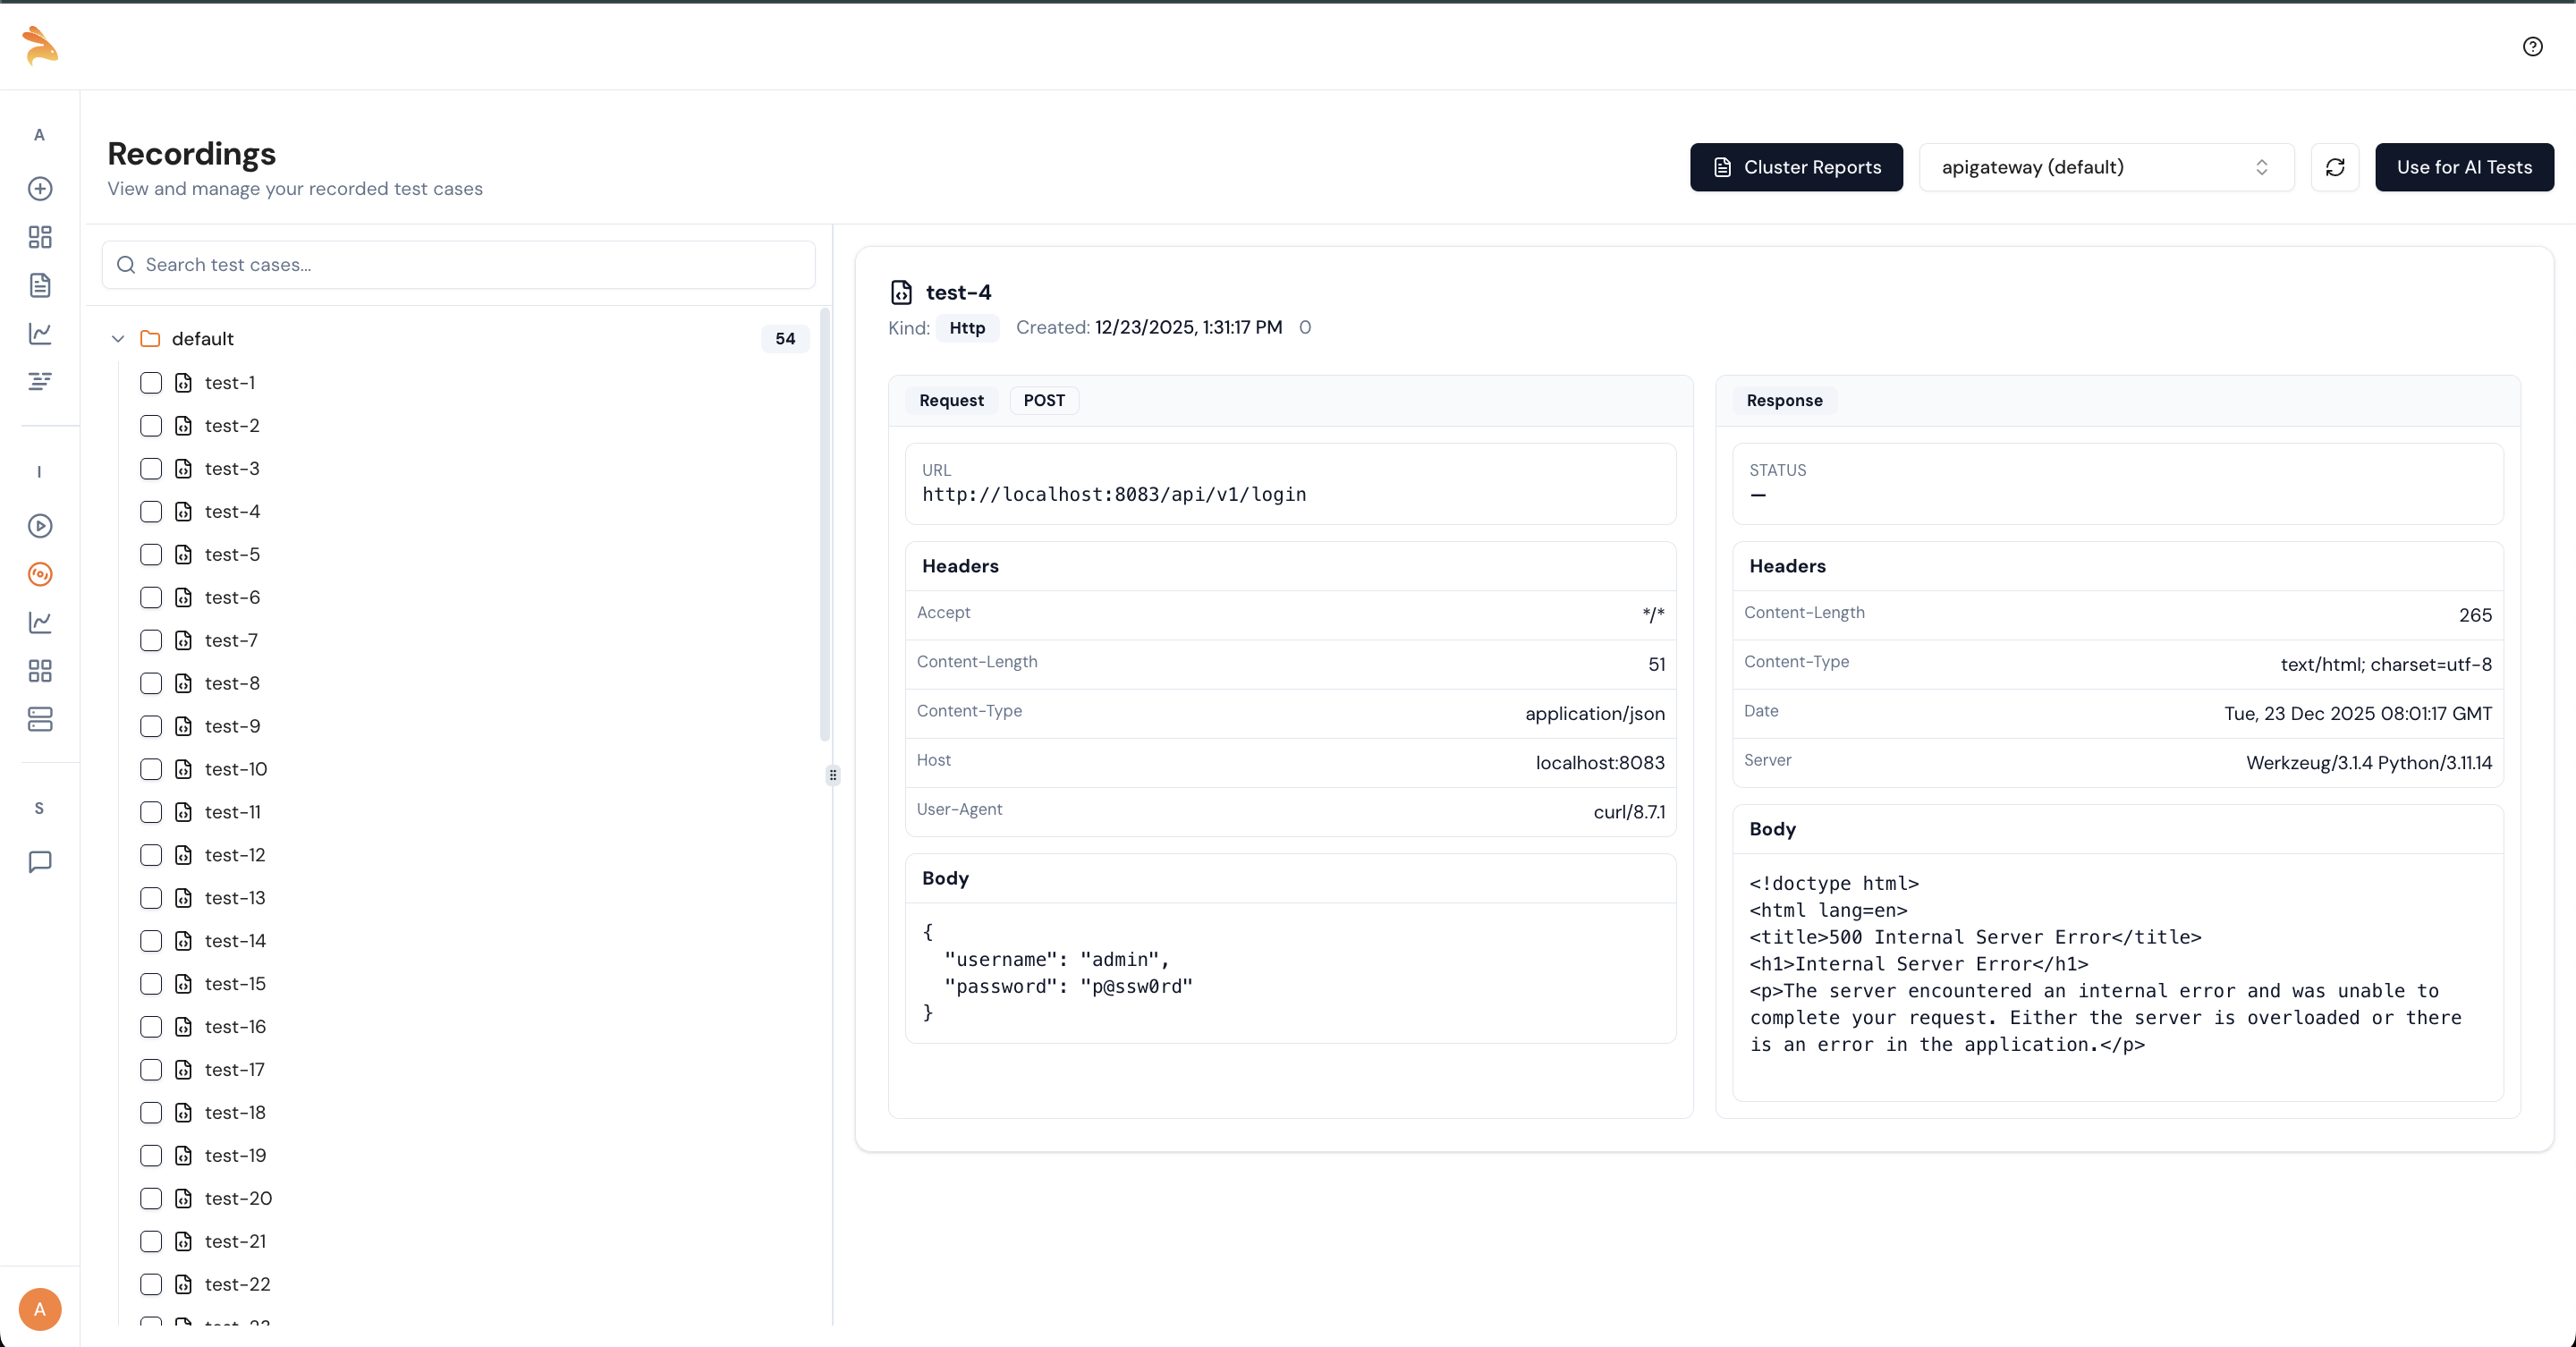
11. Generate Tests using AI
Did you notice something interesting in the dashboard? Once you have recorded a test, you can use AI to increase coverage. To generate additional tests, click Use AI for Tests.
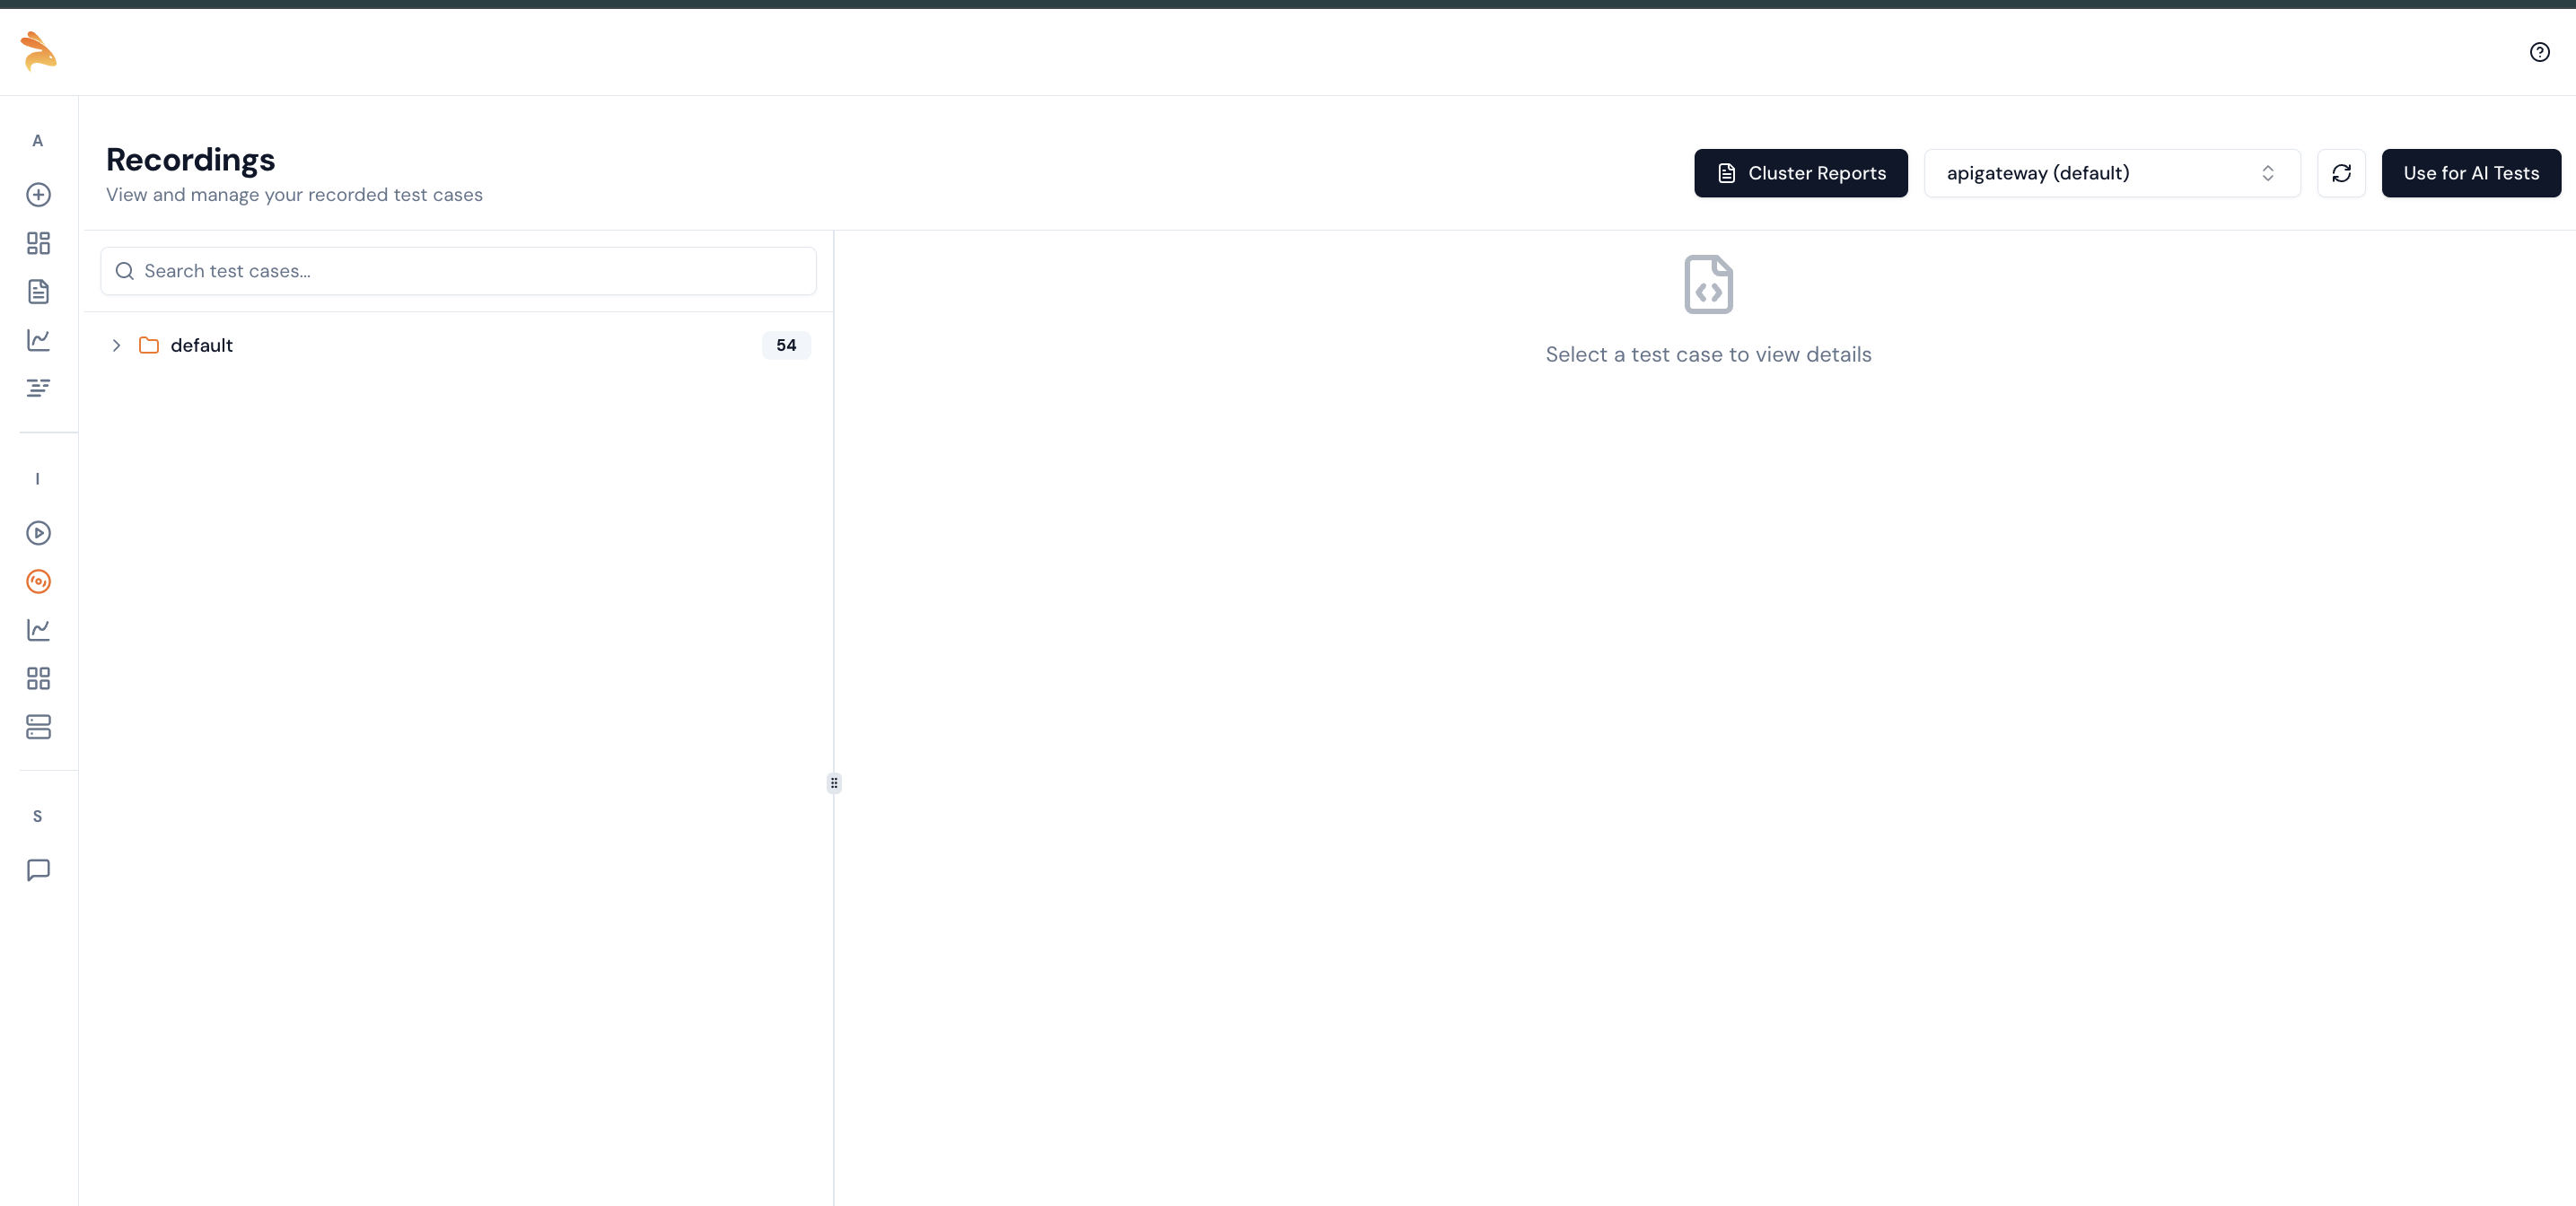
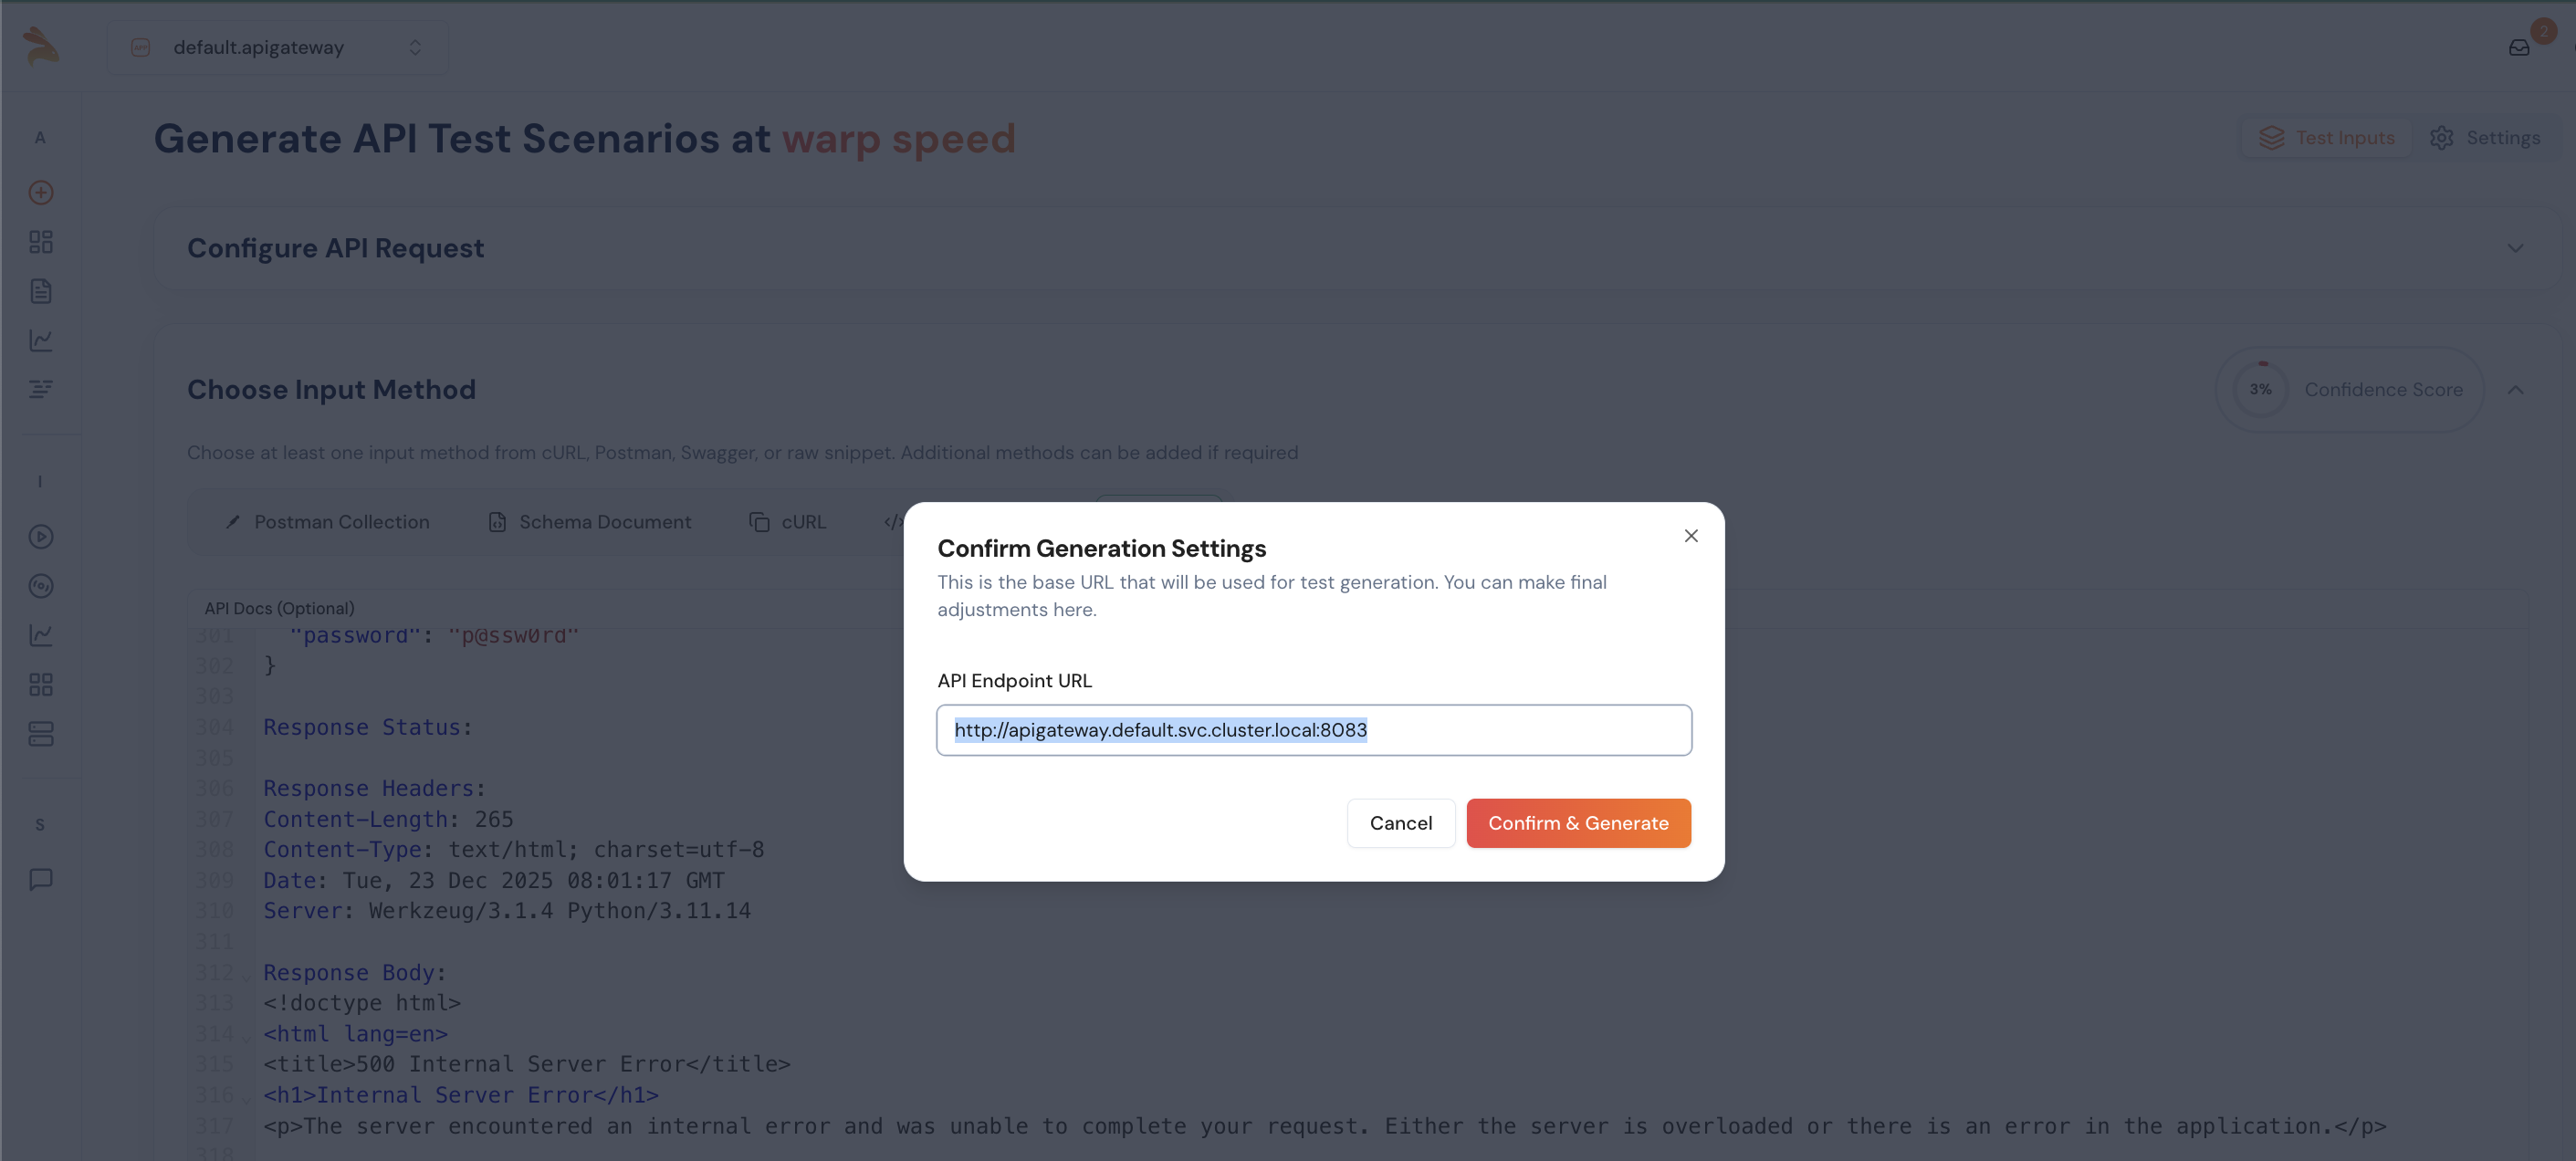
12. Verify the Generation settings
Once you click Use AI for Tests, you can view the generation settings.
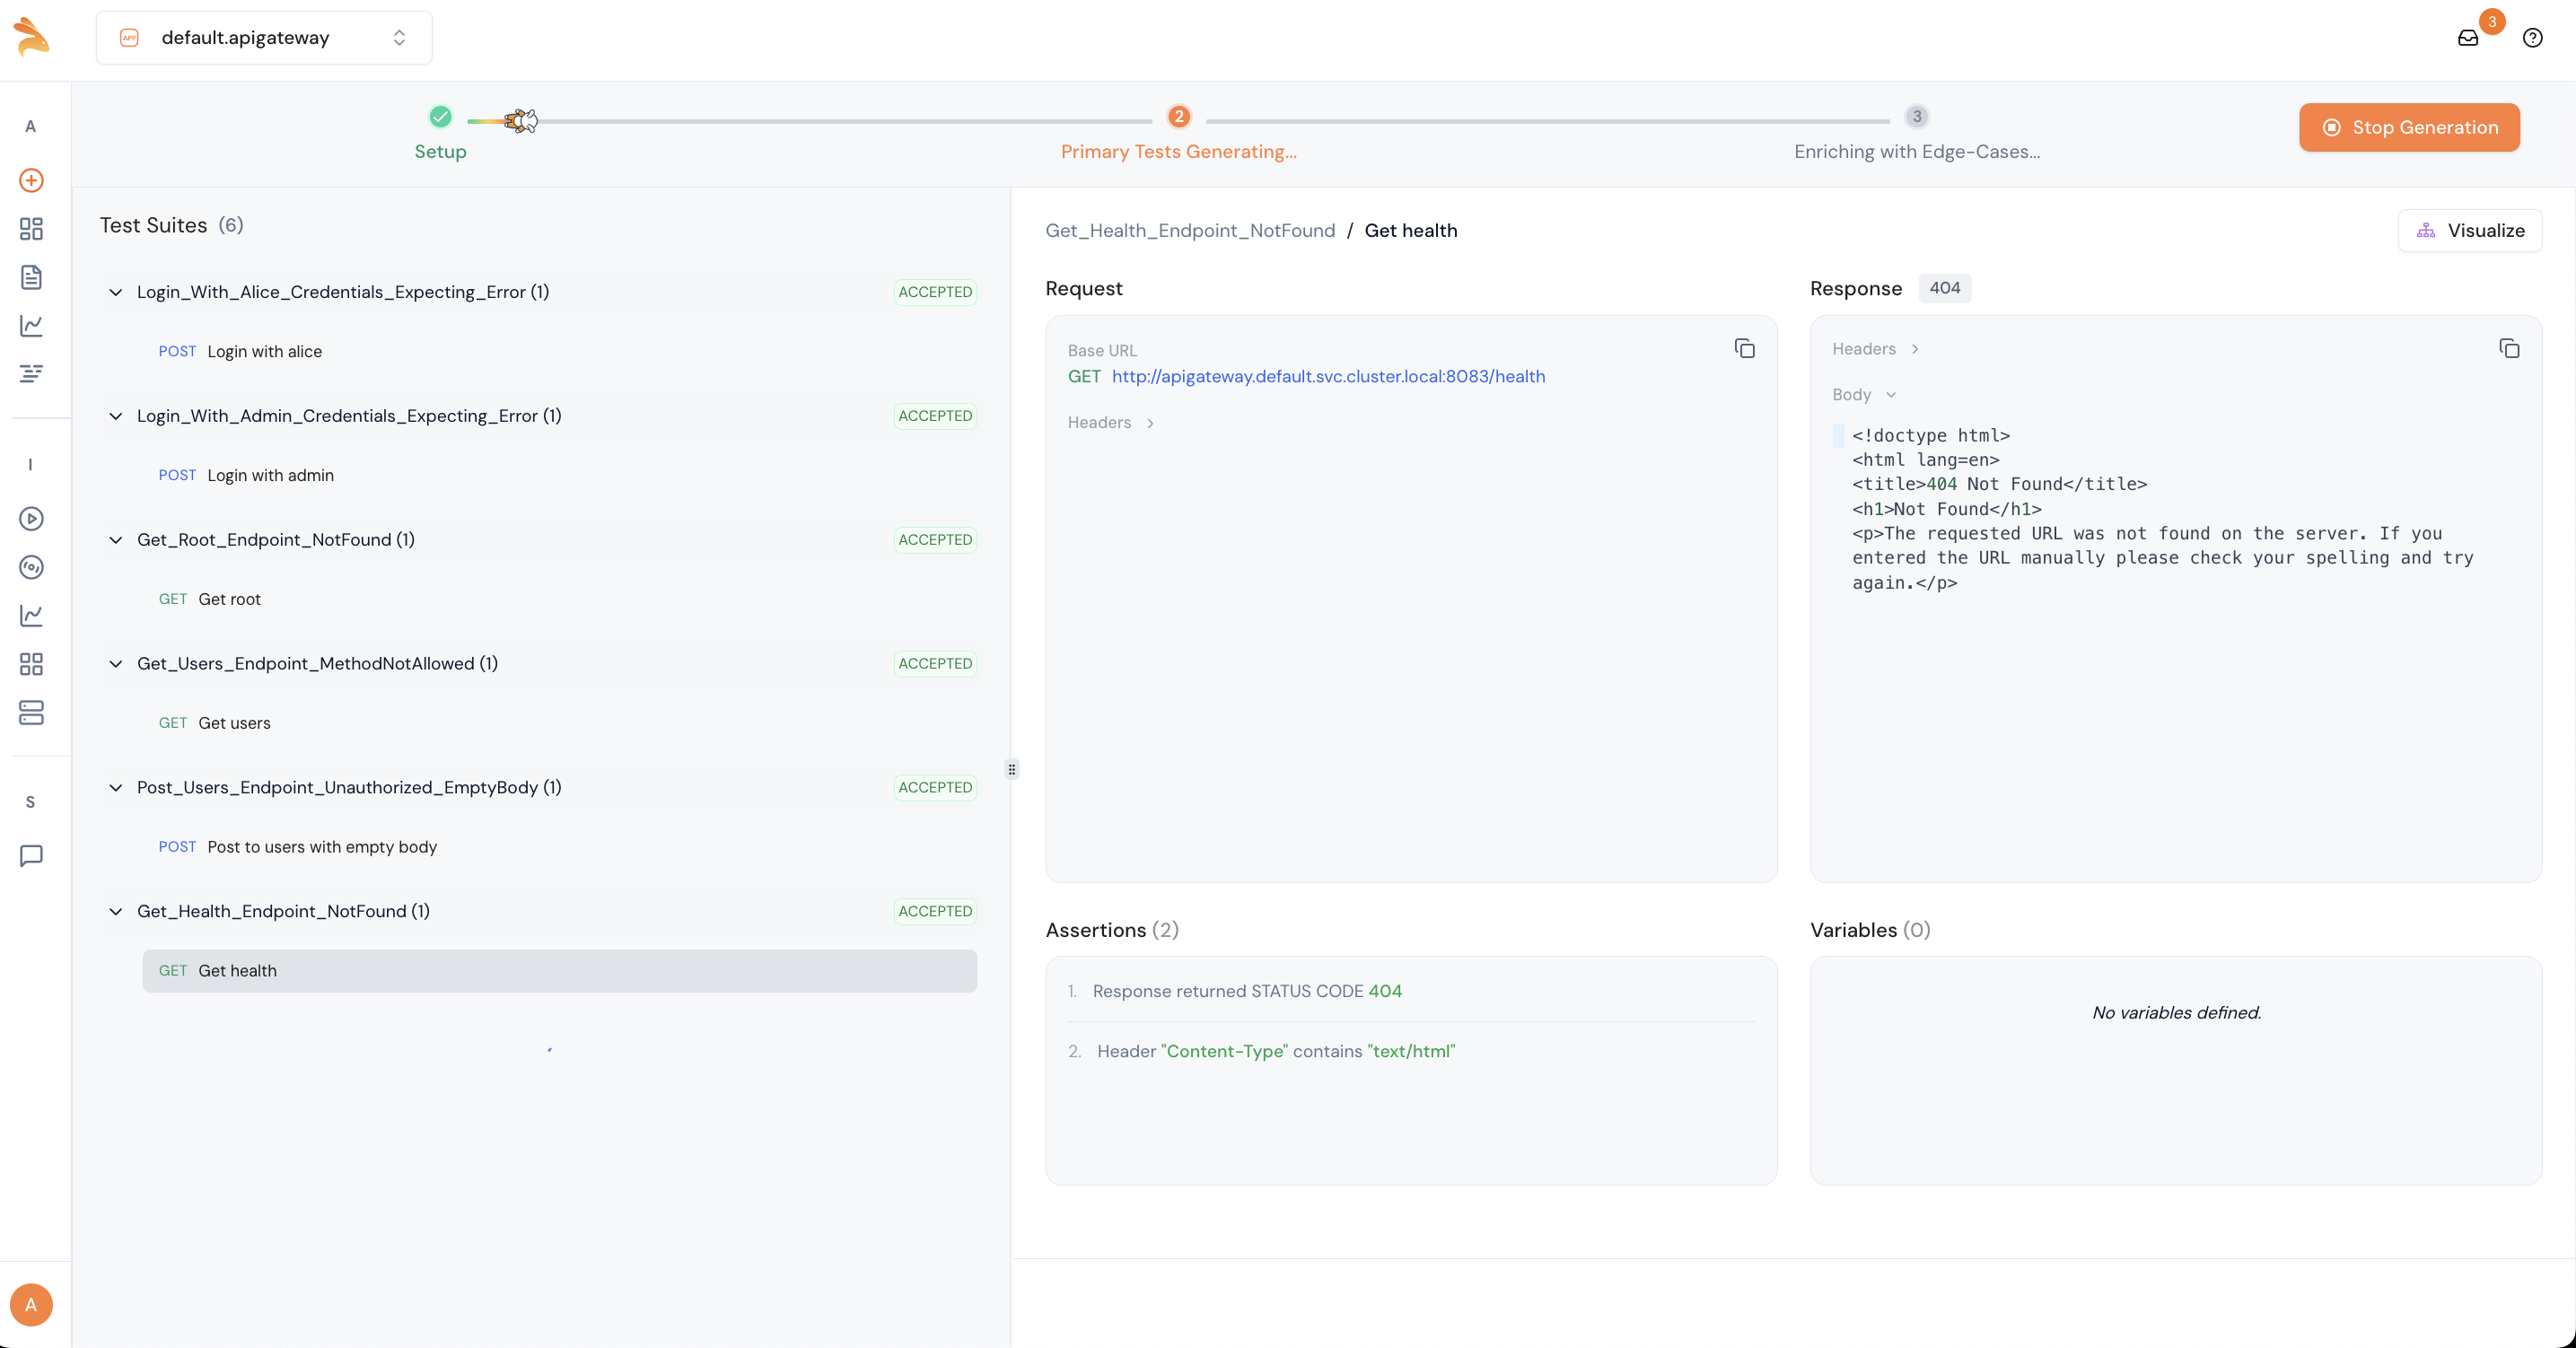
13. Verify the Generation
Once initiated, you can see the AI start generating test cases from the recorded traffic. The recorded traffic is used as input to create additional test cases.
14. View the Test Cases
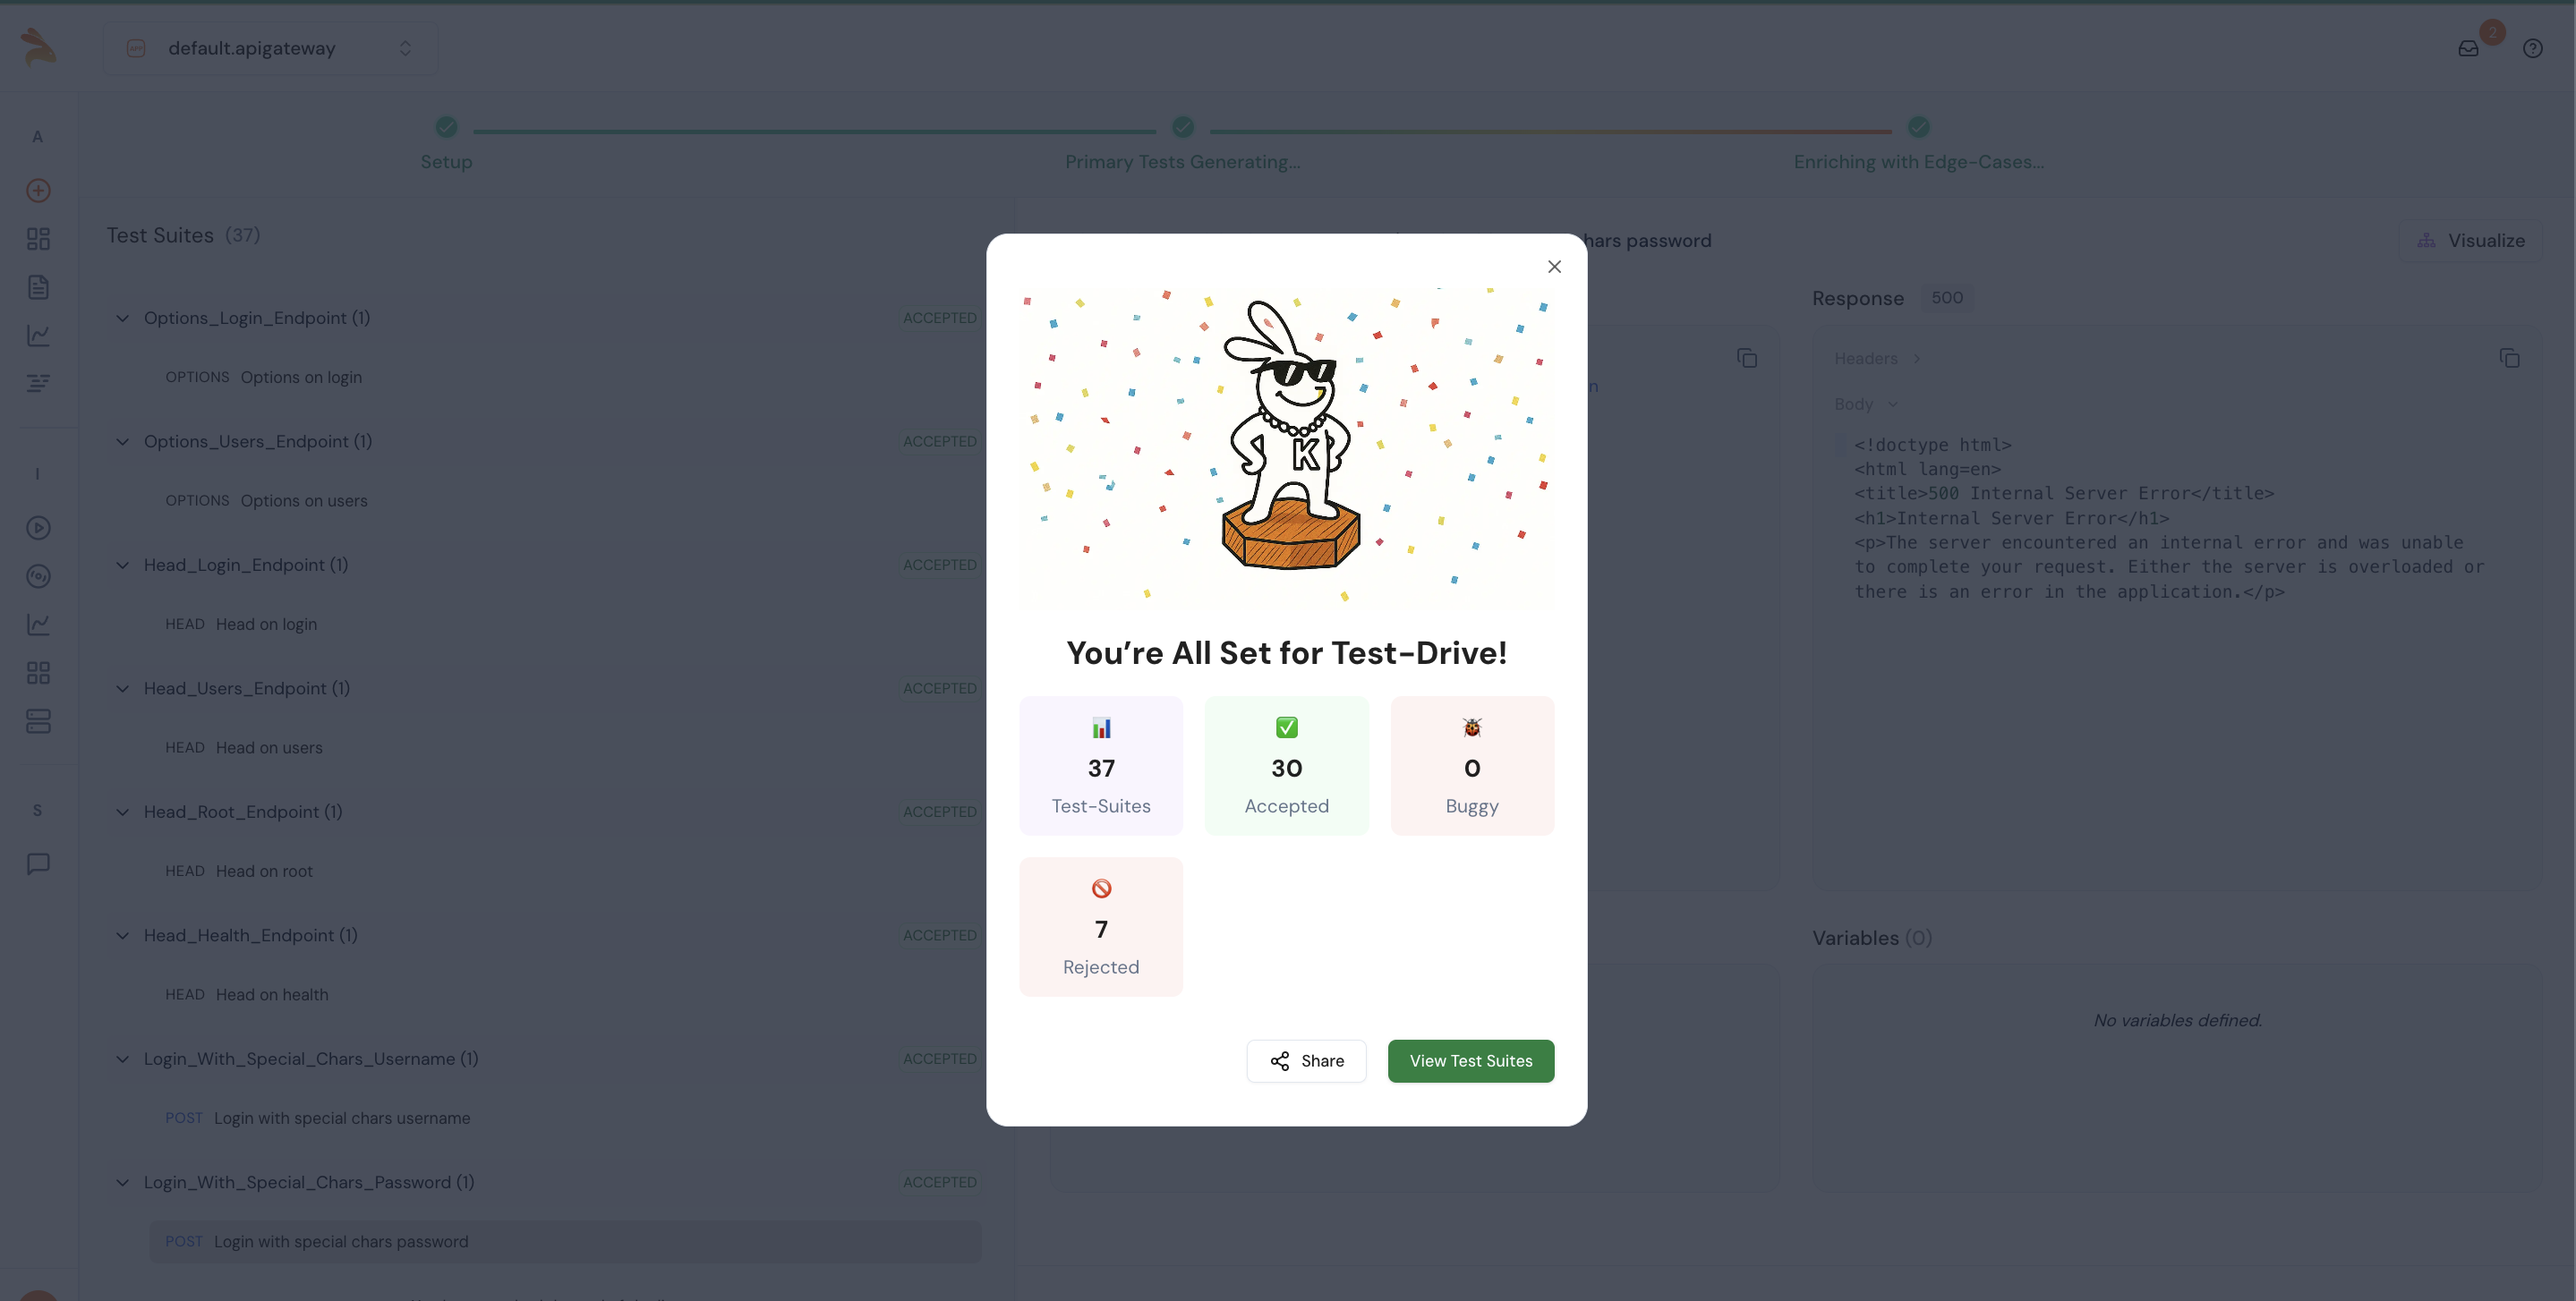
After test generation, you can view the total number of test suites categorized as accepted, buggy, and rejected.
Conclusion
In this quickstart, we demonstrated how to use the Keploy Proxy in Kubernetes to record live traffic and generate tests using AI—all without writing manual tests. This is only a quickstart; you can follow the same steps to record real, production-like traffic and generate tests using AI.
Happy Testing with Keploy
Related
- Developer Workflow with Keploy Proxy — branch, replay, and gate PRs.
- Developer + LLM Workflow with Keploy Proxy — the same flow driven by an LLM.
- E-commerce Microservices — multi-service app to record.